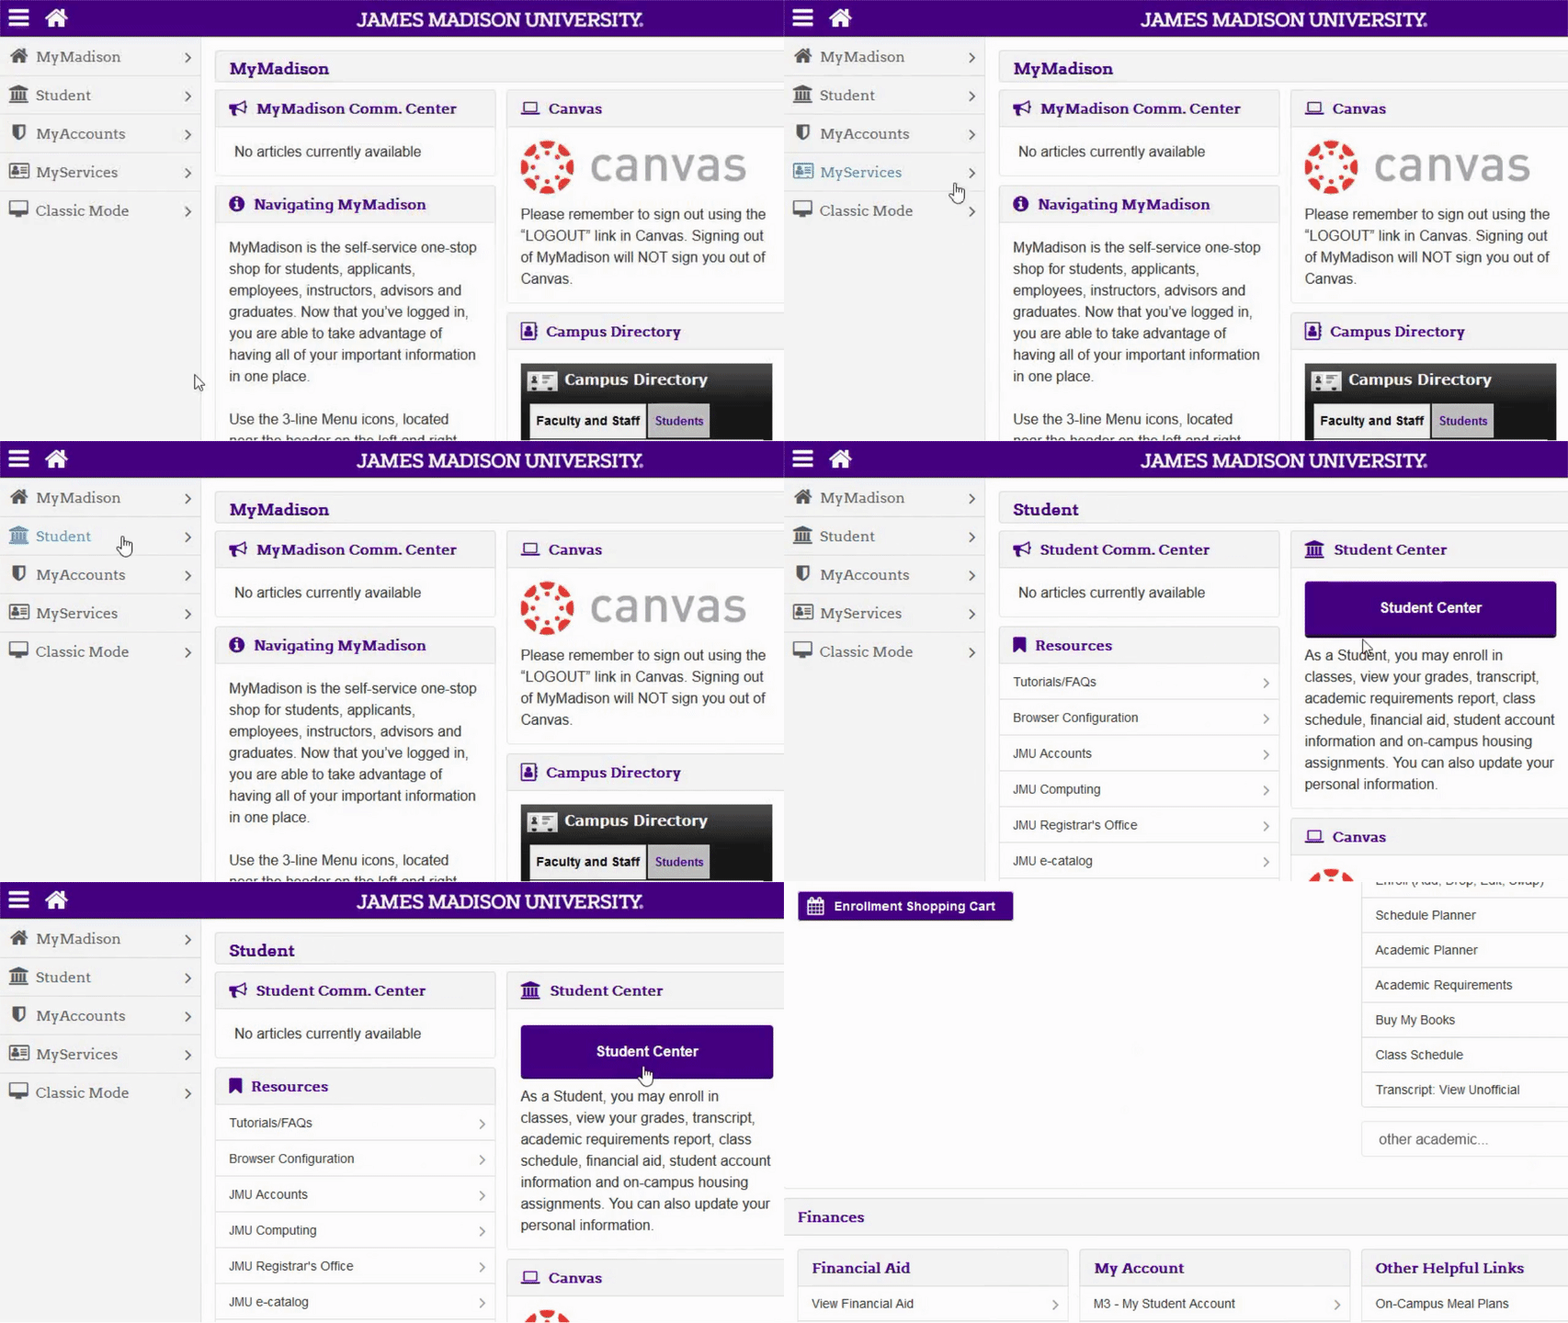
- Log-in to MyMadison (mymadison.jmu.edu).
- Click Student in the list on the left.
- Click the Student Center link.
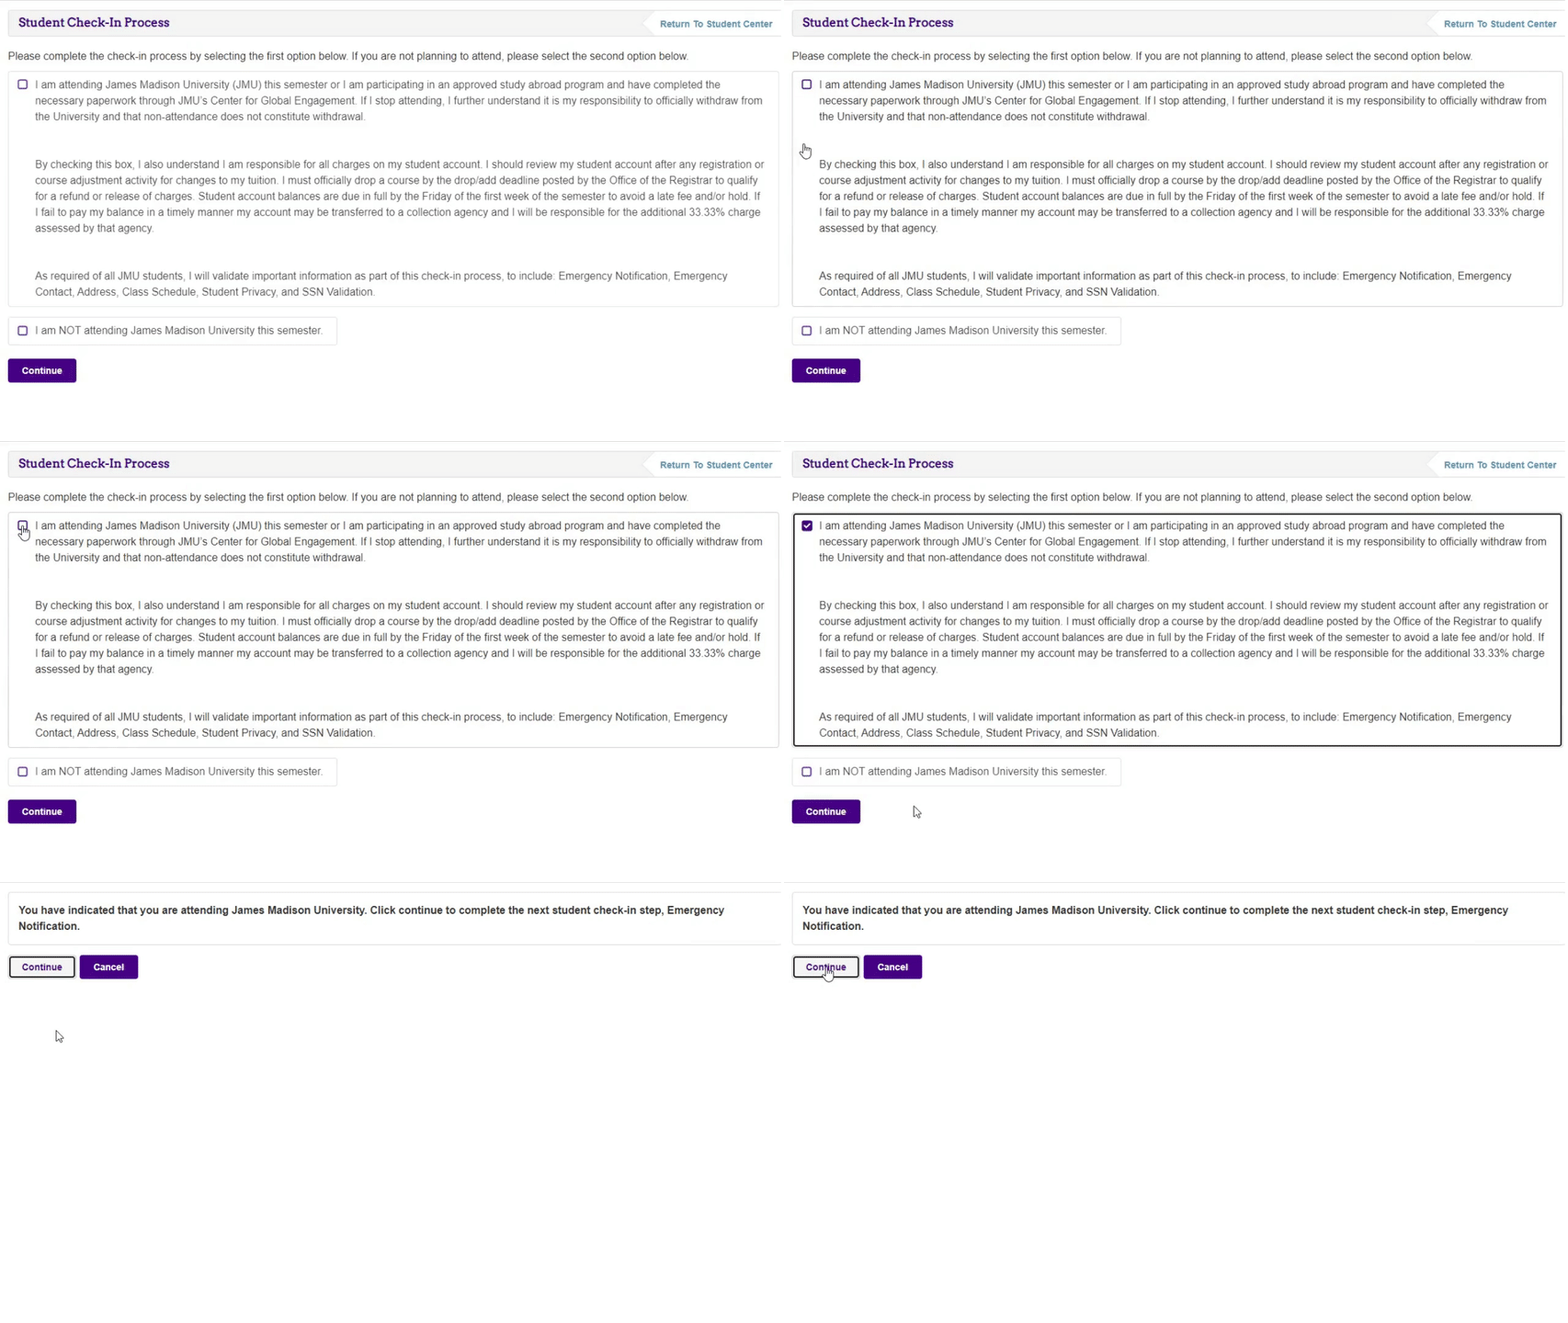
Confirm your plans to attend JMU for the semester you are checking-in.
- Select the attendance choice that corresponds with your plans for the upcoming semester.
- Click Continue.
- Click Continue to move forward or Cancel to revisit your previous response.
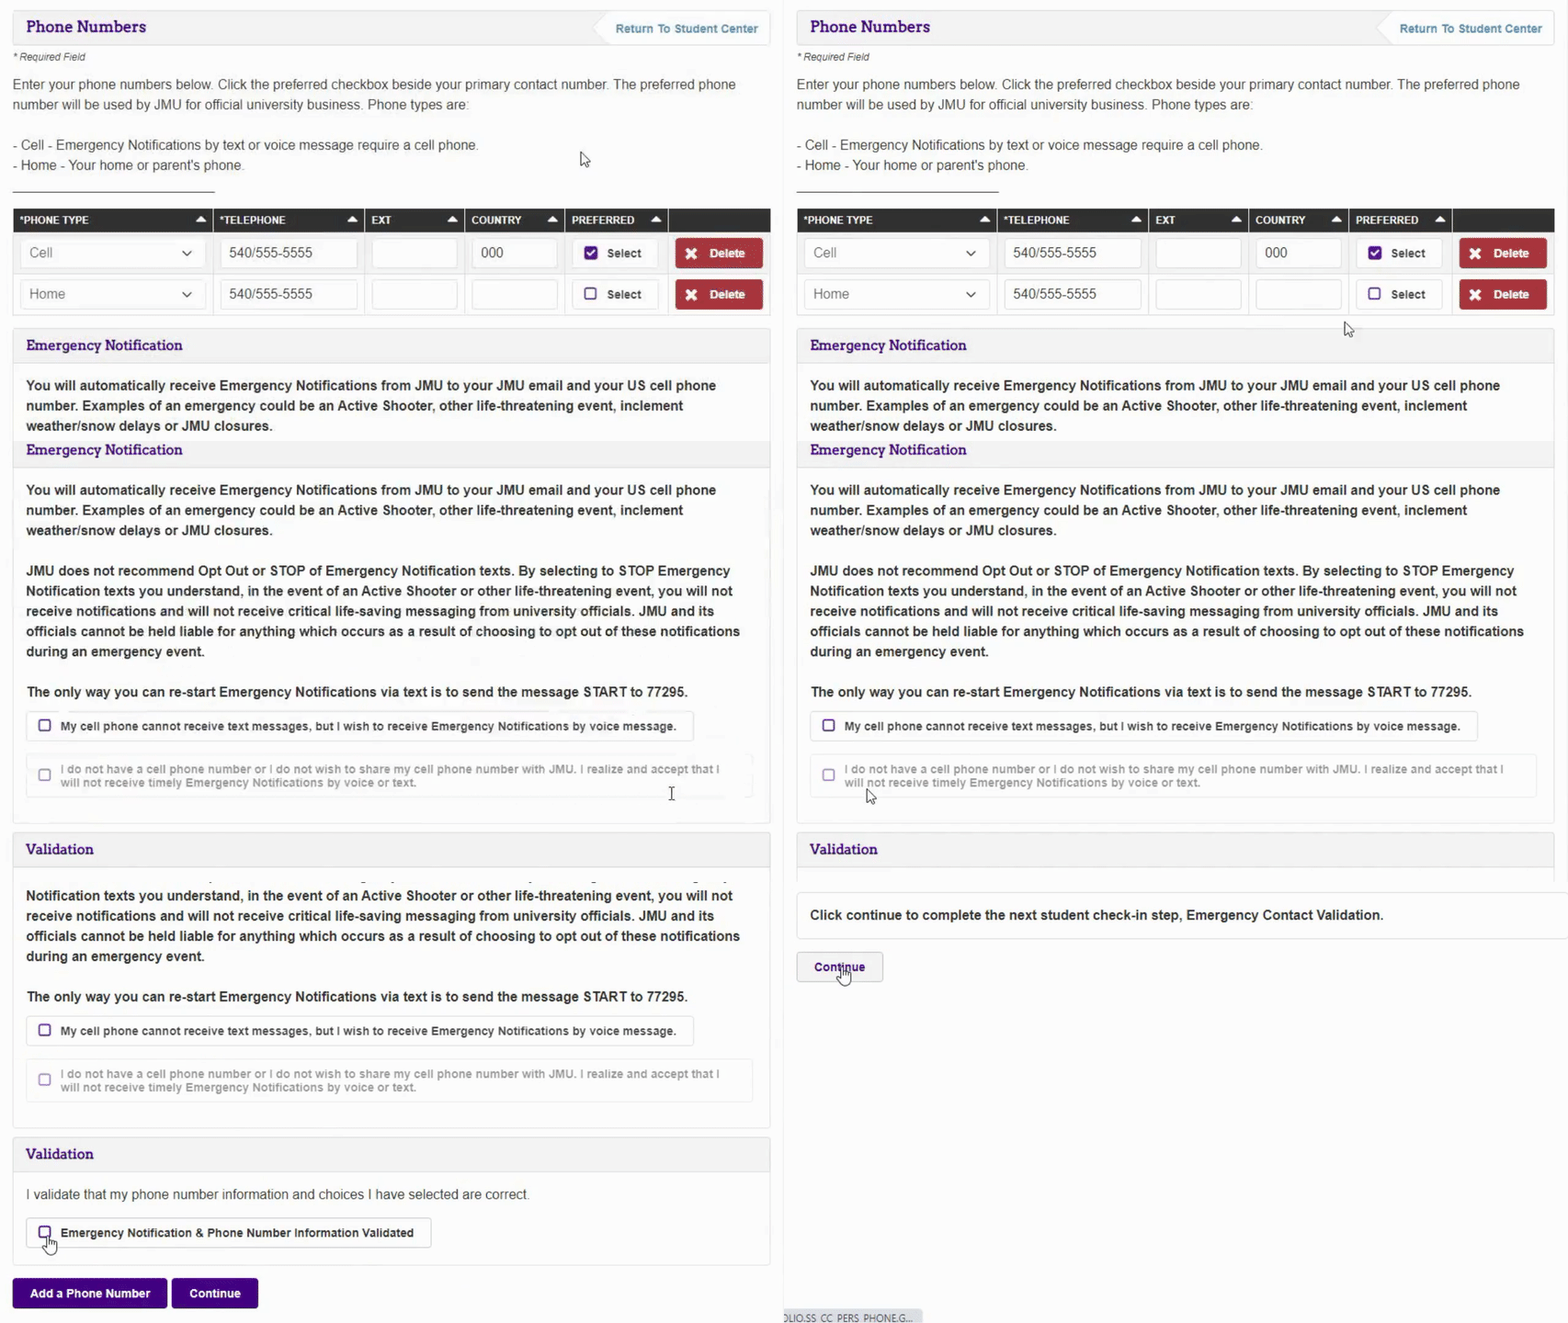
Phone Number Verification
Verify and if necessary, update your phone number and choose your preferred emergency notification method.
- Verify the Phone Numbers provided, including Phone Type.
- Click Delete by any Phone Numbers that are no longer correct.
- Click Add A Phone Number at the bottom of the screen to add a new Phone Number.
- Choose a Preferred phone number.
- You will automatically receive Emergency Notifications from JMU to your JMU email and your US cell phone number.
- If applicable, click My cell phone cannot receive text messages, but I wish to receive Emergency Notifications by voice message.
- If you do not have a cell phone or do not wish to share your cell phone with JMU, click I do not have a cell phone number...
- Click the Emergency Notification & Phone Number Information Validated box.
- Click Continue.
- Click Continue to proceed to the next step.
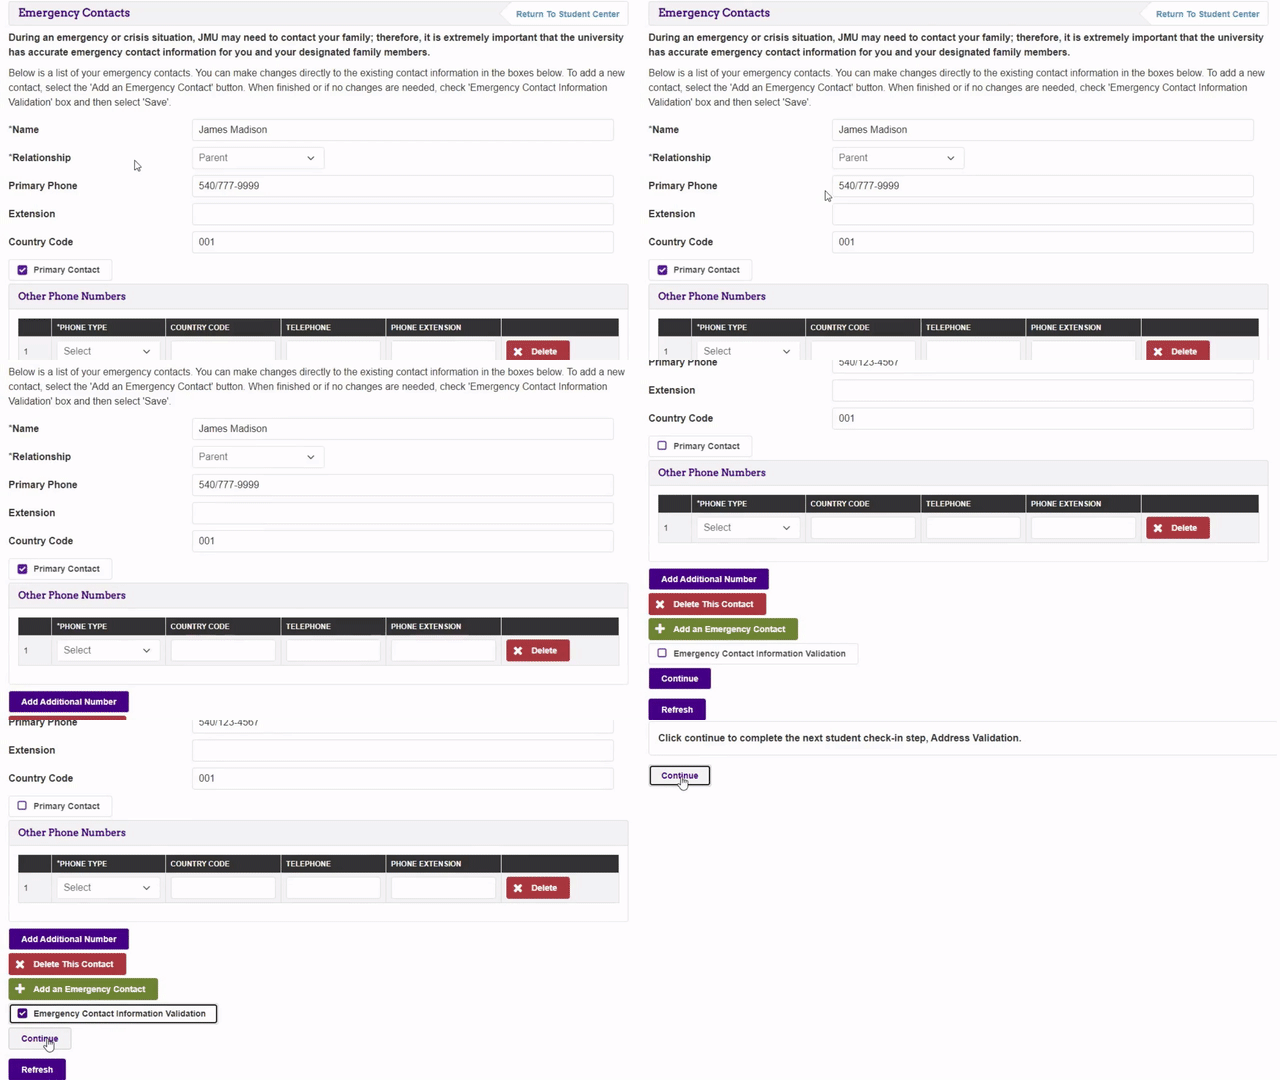
Emergency Contact Verification
Verify and if necessary, update your emergency contacts for JMU to use in-case of an emergency.
- Verify the Emergency Contacts provided.
- Click delete by any phone types that need to be removed.
- Click any contacts that need to be updated and make necessary updates.
- Click Delete This Contact to remove a contact.
- You must confirm the Delete or cancel to stop the Delete.
- Click Add An Emergency Contact to create a new contact.
- Enter necessary information.
- Ensure that you have a Primary Contact selected.
- Click the Emergency Contact Information Validated box.
- Click Continue.
- Click Continue to proceed to the next step.
Address Verification
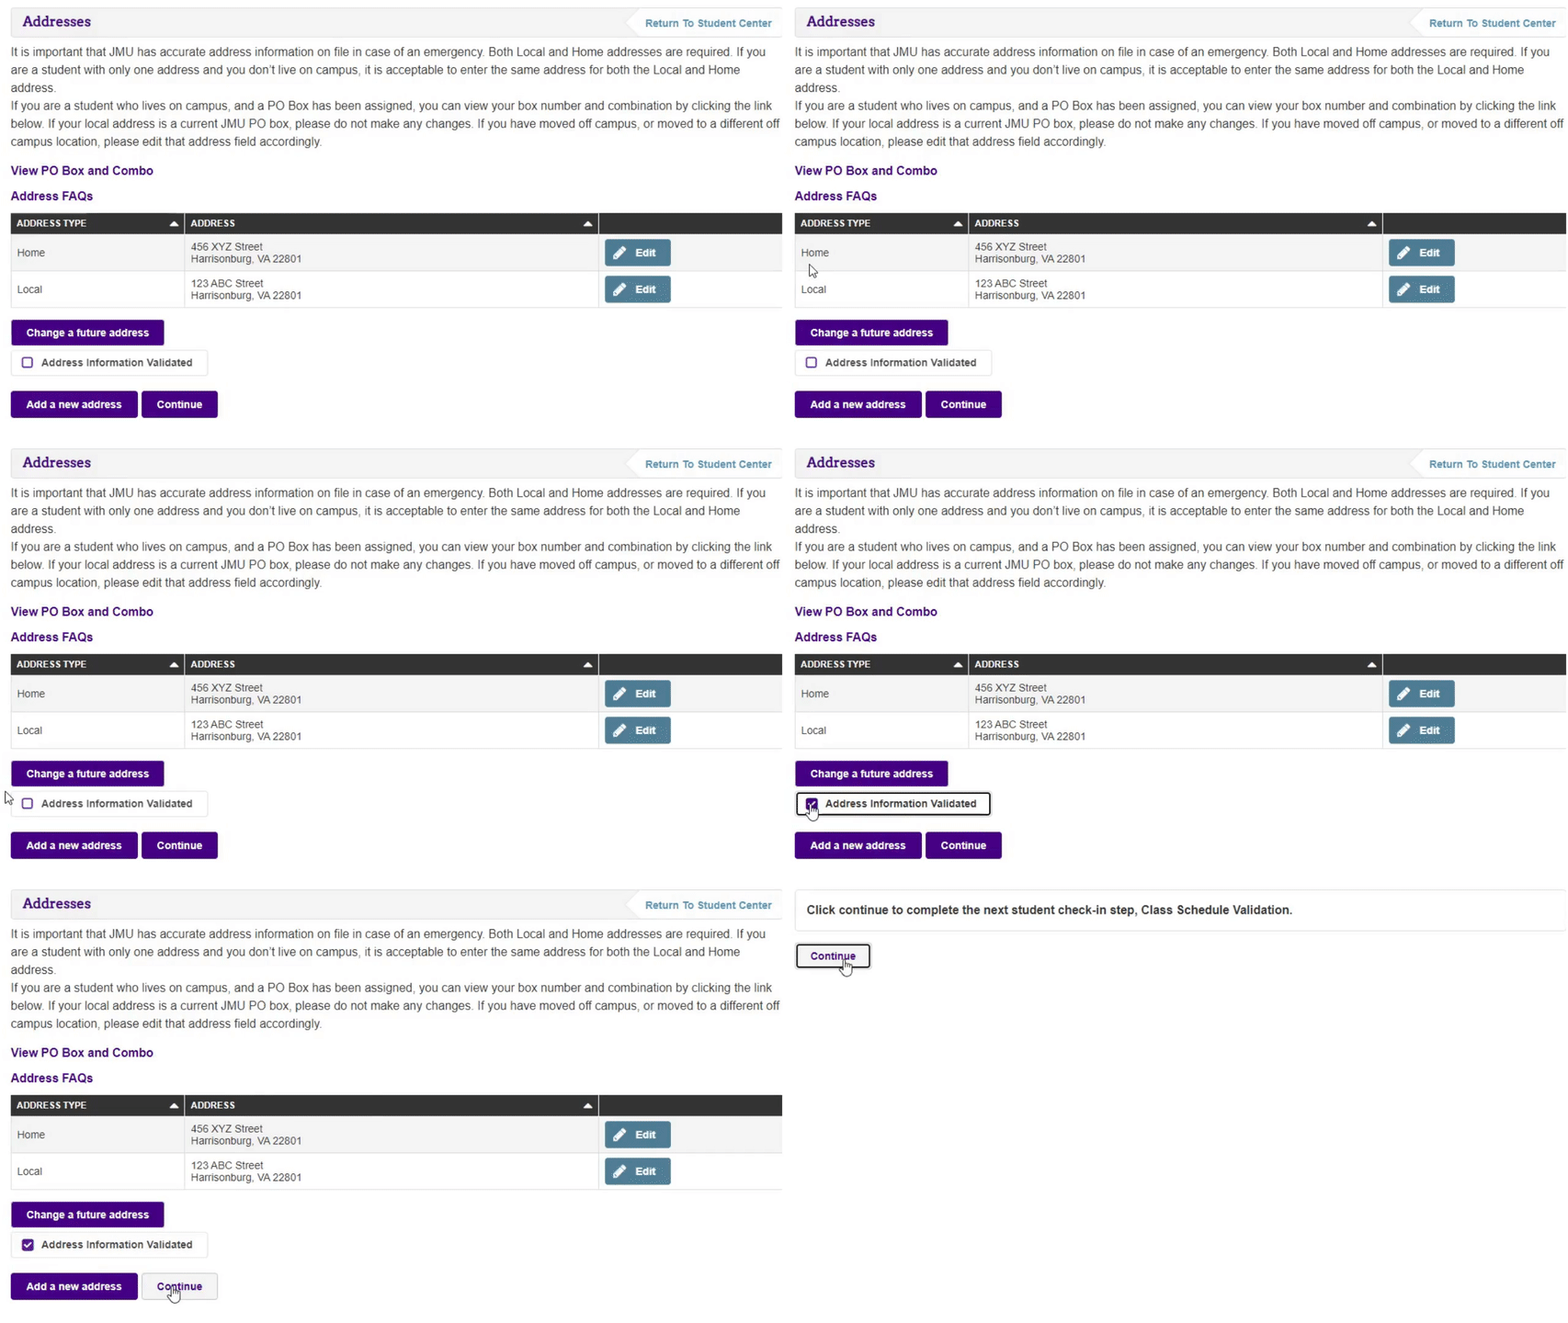
Verify and if necessary, update your addresses.
- Verify the Addresses and Address Types provided.
- Click delete by any addresses that need to be removed (you must have local and home address).
- Click edit by any addresses that need to be updated.
- Make necessary updates.
- Click OK.
- Click Save.
- Click OK.
- Click Add A New Address to create a new contact.
- Enter necessary information.
- Click OK.
- Ensure that you have a Primary Contact selected.
- Click the Address Information Validated box.
- Click Continue.
- Click Continue to proceed to the next step.
Class Schedule Verification
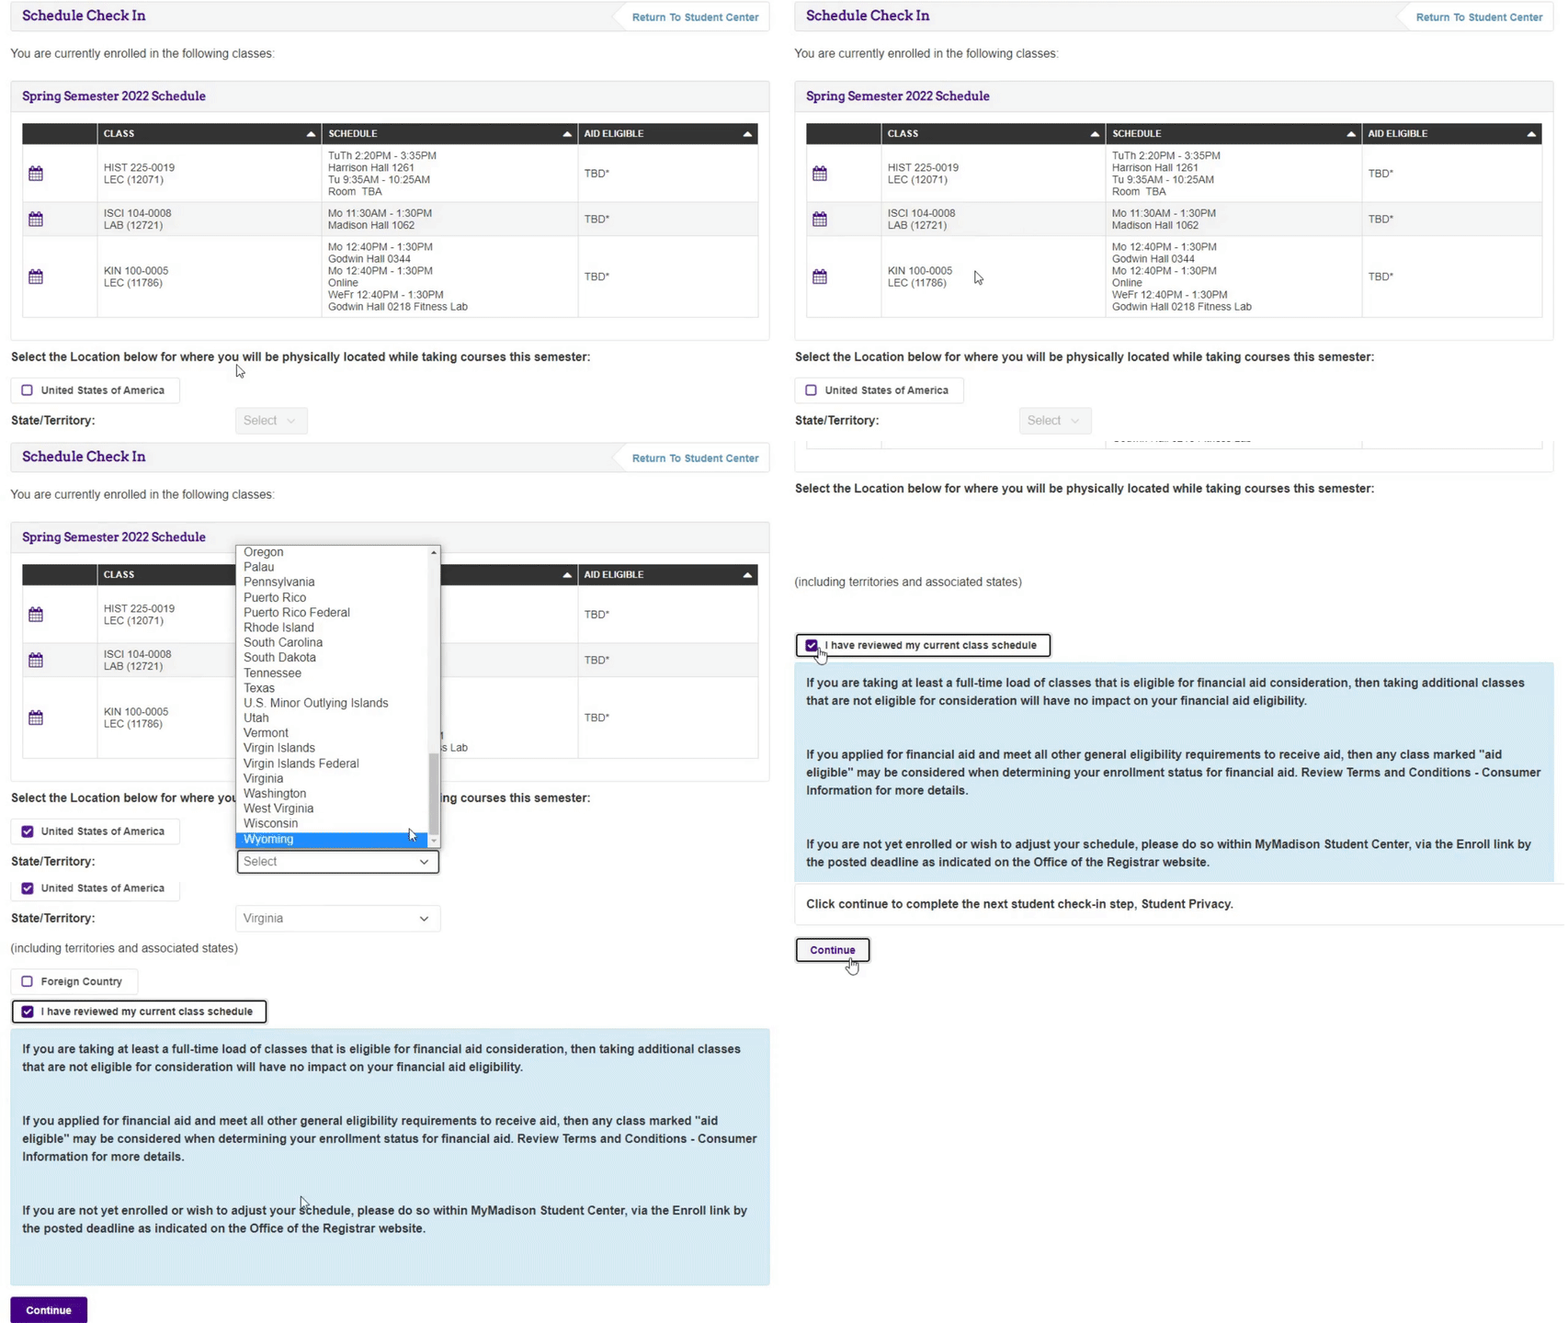
Verify your class schedule for the semester you are checking-in.
- Verify the Class Schedule.
- Select the Location where you are physically located while taking courses in the semester you are checking in.
- You must select USA or Foreign Country.
- You must select the state or territory if USA selected.
- Click the I have reviewed my current class schedule box.
- Once you have reviewed the text, click Continue.
- Click Continue to proceed to the next step.
Student Privacy Declaration
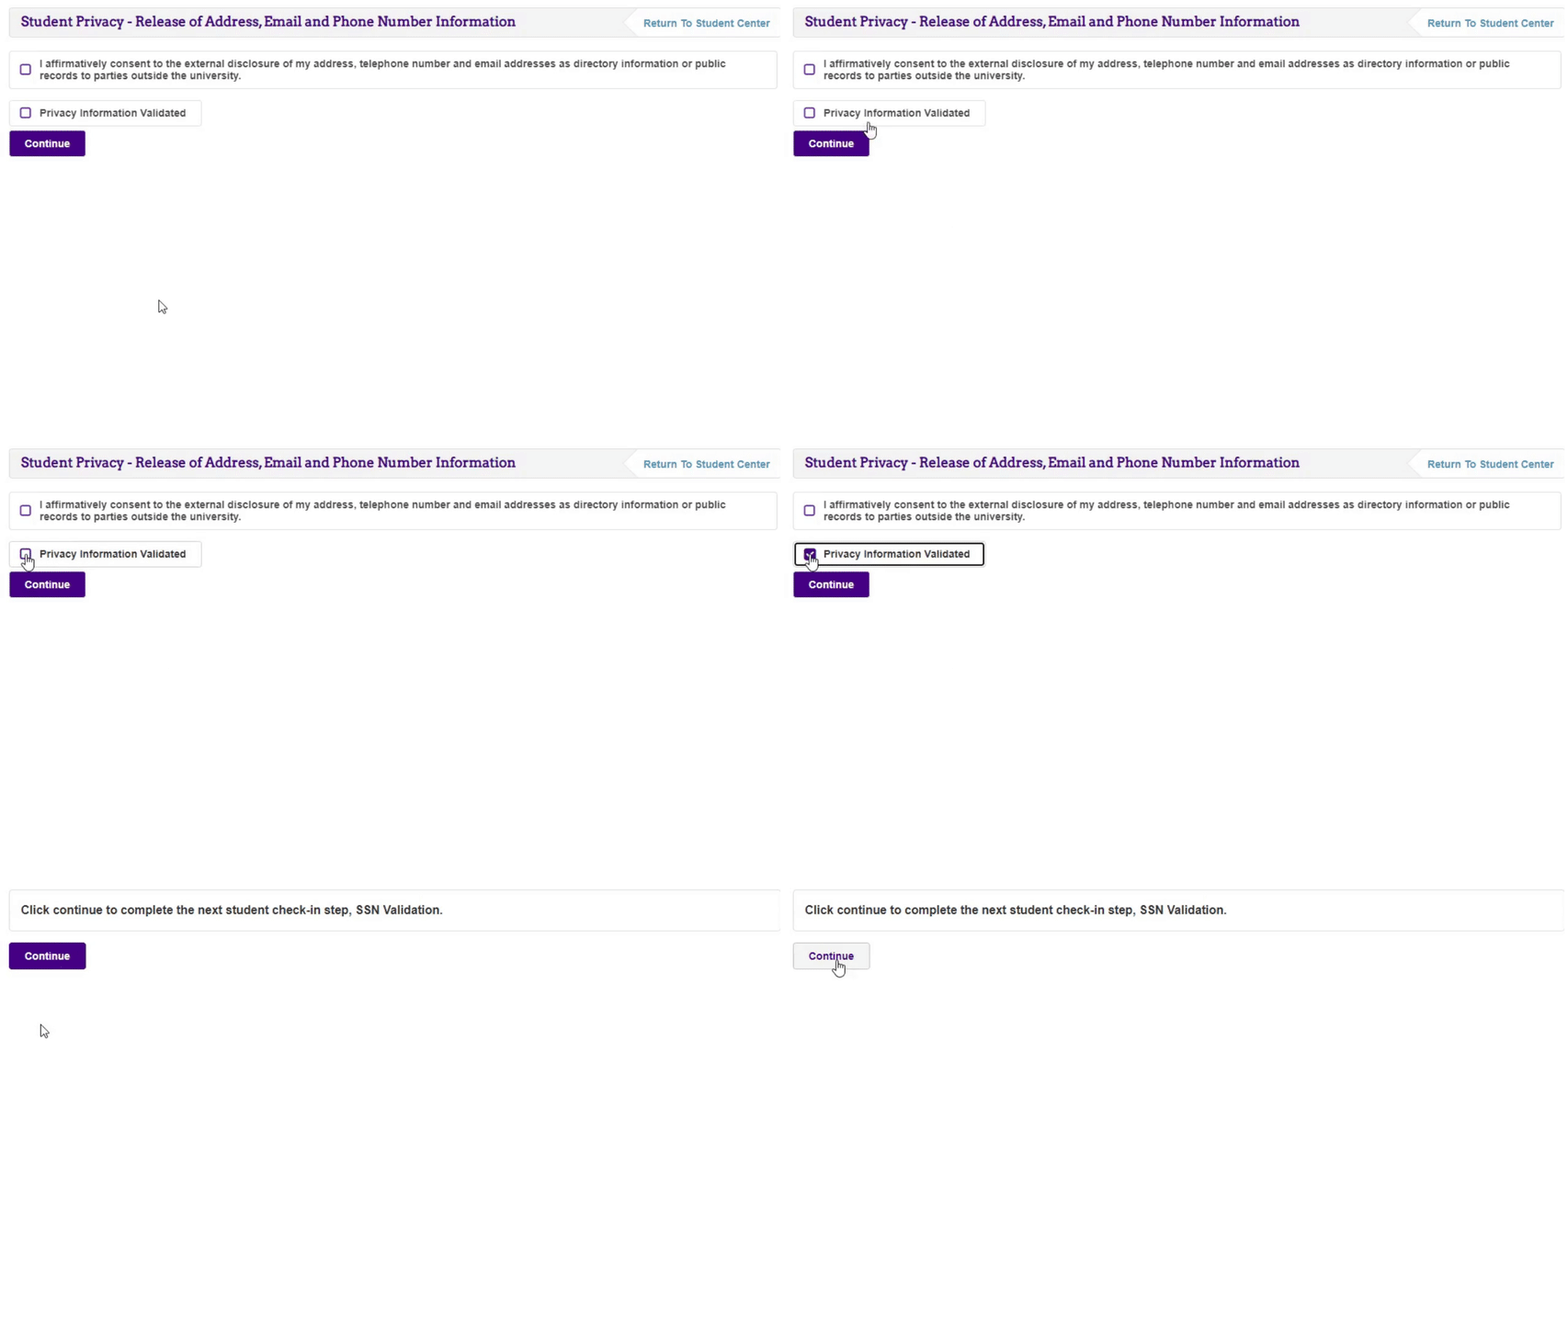
Verify your student privacy declarations.
- Select your desired student record release option.
- Click the Privacy Information Validated box.
- Click Continue.
- Click Continue to proceed to the next step.
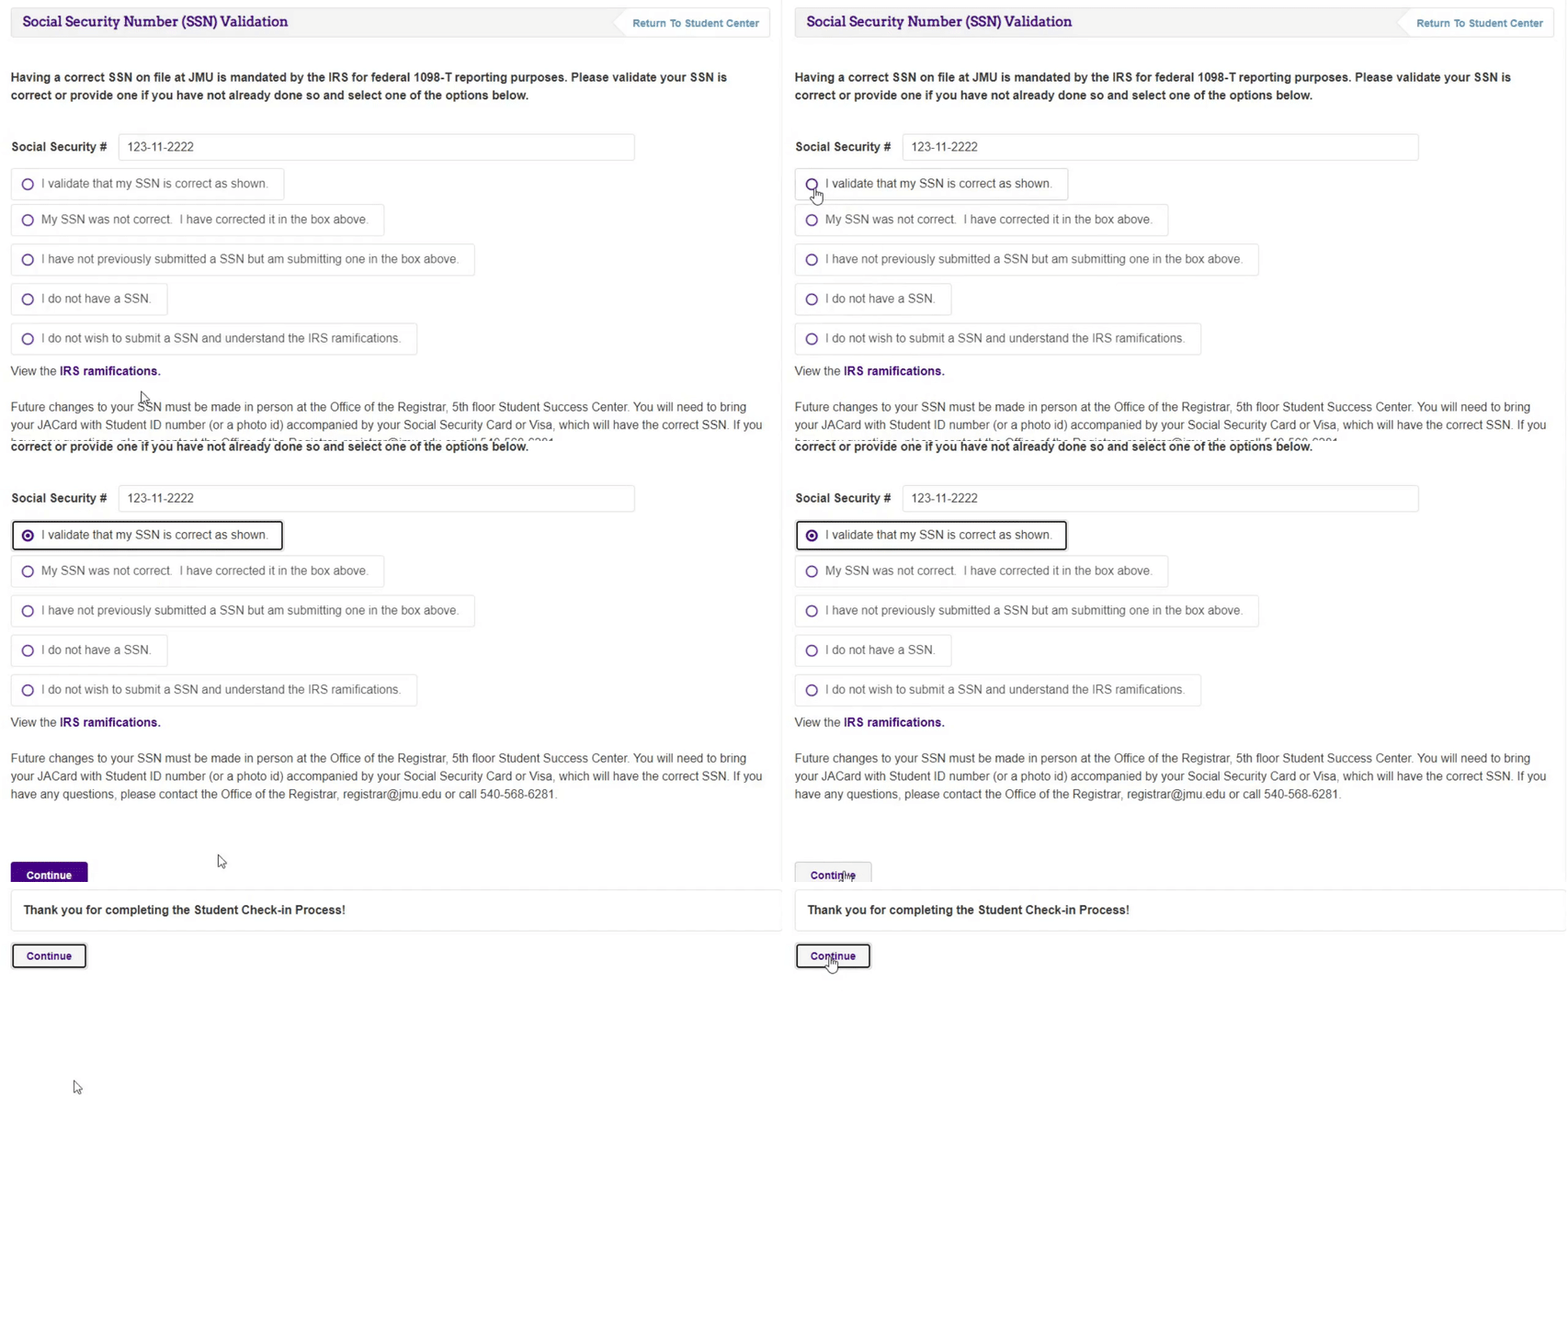
Social Security Number Verification
Verify and if necessary, update your Social Security Number.
- Verify the Social Security # provided.
- You may update the Social Security #, if incorrect.
- Select your response to the provided information.
- Click Continue.
- Click Continue to proceed to the next step.
