Accessing the Student Center
- Log-in to MyMadison (mymadison.jmu.edu).
- Click Student in the list on the left.
- Click the Student Center link.

Accessing Schedule Planner
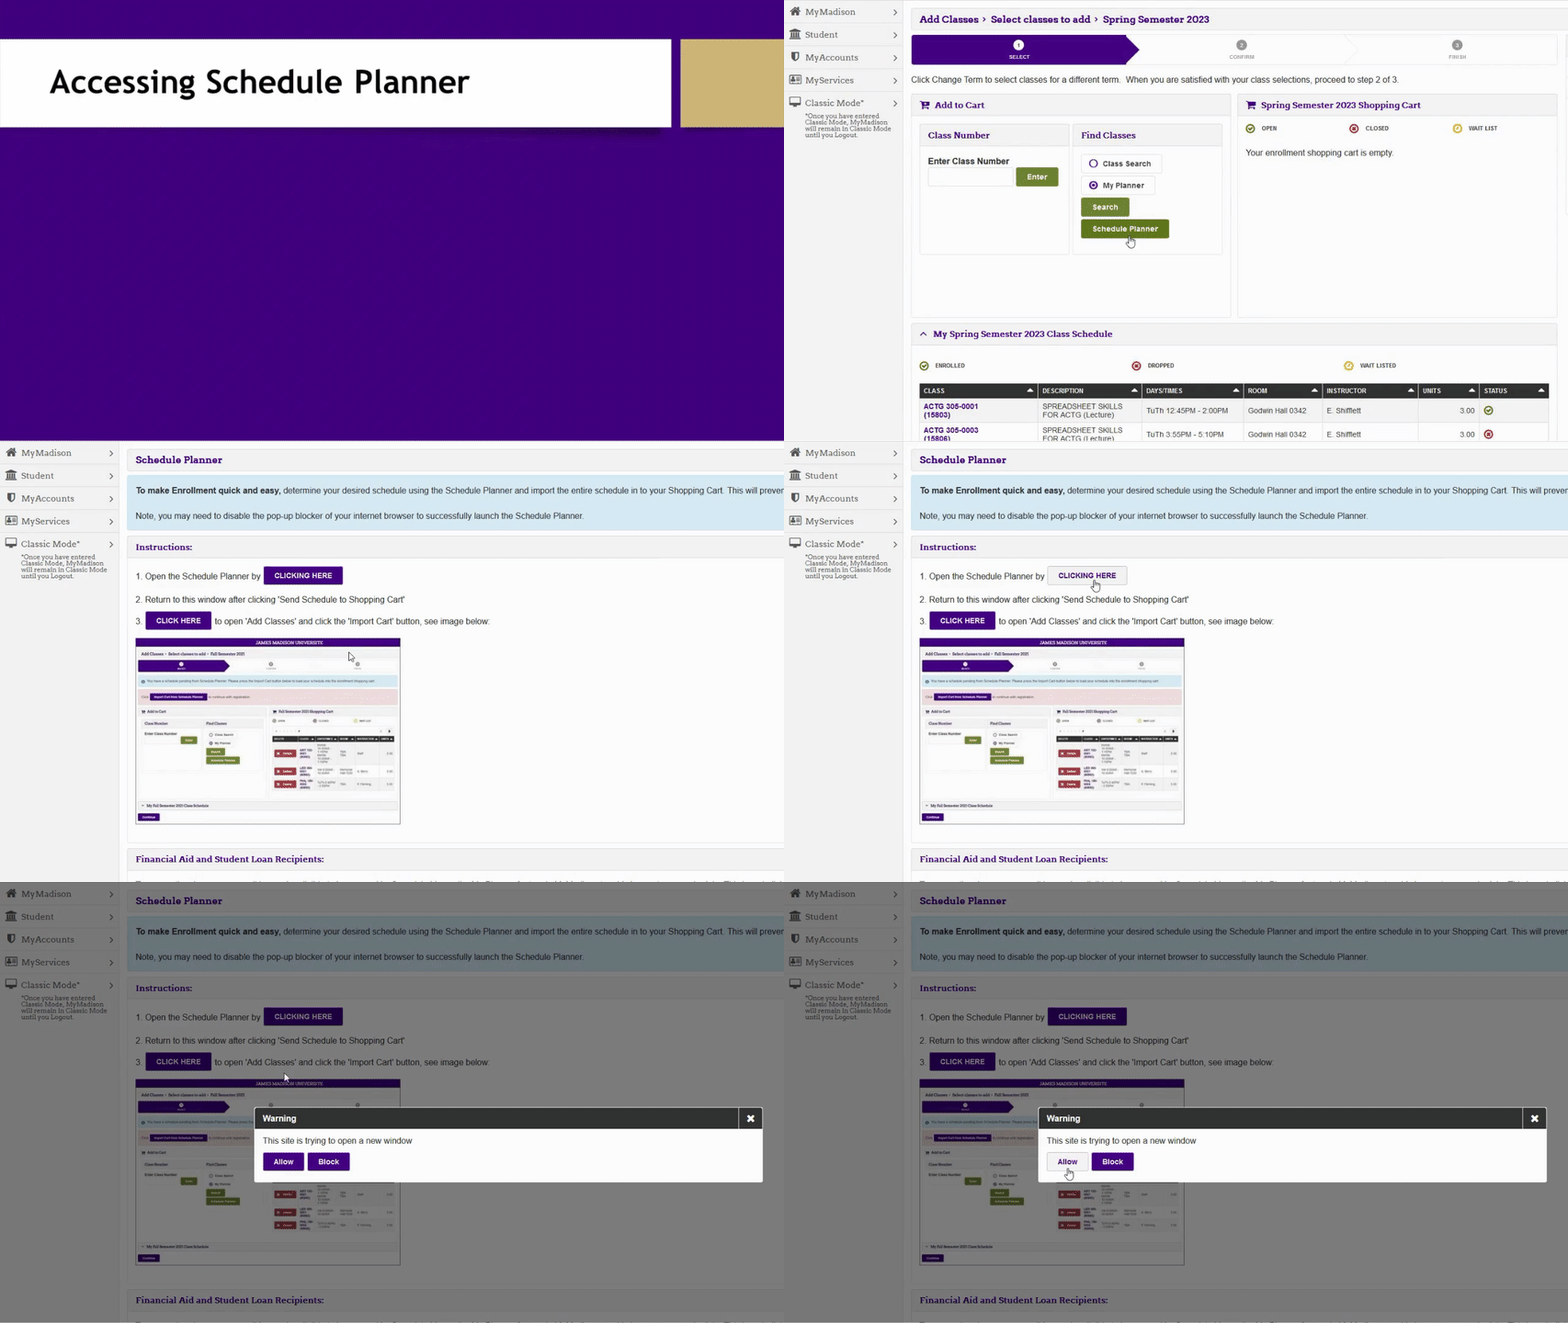
- Under Find Classes, click Schedule Planner.
- Under the instructions, follow the link on line 1 that states CLICKING HERE.
- Select Allow.
Updating Course Search Criteria
Changing Term
- Go to the top where it states Term.
- Select Change.
- Select which term you want to look at.
- Click Save to begin scheduling.

Updating Course Status
- Go the top where it states Course Status.
- Select Change.
- Select the options you would like to be presented with.
- Open Classes have space available in the class.
- Full Classes have no space available in the class.
- Full with Waitlist Classes currently have no space available in the class, but if a student selects it and space becomes available, then they could be enrolled in the class.
- After making the selection, click Save.

Updating Sessions
- Go to the top where it states Sessions.
- Click Change.
- Select which class sessions you wish to see.
- After making the selection, click Save.

Updating Instruction Modes
- Go to the top where it states Instruction Modes.
- Click Change.
- Select the methods of content delivery you would like to see.
- If the box on the left is checked, then the classes with those instruction modes will be presented as options when generating schedules.
- After making the selection, click Save.

Adding a Course
Search for/Add a Course by Subject
- Go to Courses.
- Click Add Course.
- Select the tab that states By Subject.
- Using the Subject dropdown menu, choose the subject of the course in which you wish to enroll.
- Using the Course downdown menu, choose the Course Number for the Subject.
- Click Add Course.
- Click Schedule Planner to get back to the main Schedule Planner page.

Search for/Add Course by Attribute
- Go to Courses.
- Click Add Course.
- Select the tab that states Search by Course Attribute.
- Using the Attribute dropdown menu, choose the attribute that matches the course in which you wish to enroll.
- Using the Subject dropdown menu, choose the subject of the course in which you wish to enroll.
- Using the Course dropdown menu, choose the Course Number for the Subject.
- Click Add Course.
- Click Schedule Planner to get back to the main Schedule Planner page.

Adding a Break
- Go to Breaks.
- Click Add Break.
- Add a name for the break.
- Select the time the break will start and when it will end.
- Select the day(s) the break will be.
- Select whether the break will be ongoing.
- Click Add Break.

Generating Possible Schedules
Selecting Desired Sections of Courses Added
- Go to Courses to view courses that have been added.
- On the course you wish to edit, click Options.
- Select the class sections you wish to be used when generating schedules.
- Click Save.

Generating Possible Schedules
- Go to Courses and select the courses you want to be used in a generated schedule.
- Click Generate Schedules at the bottom of the page.
- Click View to see the schedule and how many seats are available in each course.

Selecting/Saving Entire Possible Schedules
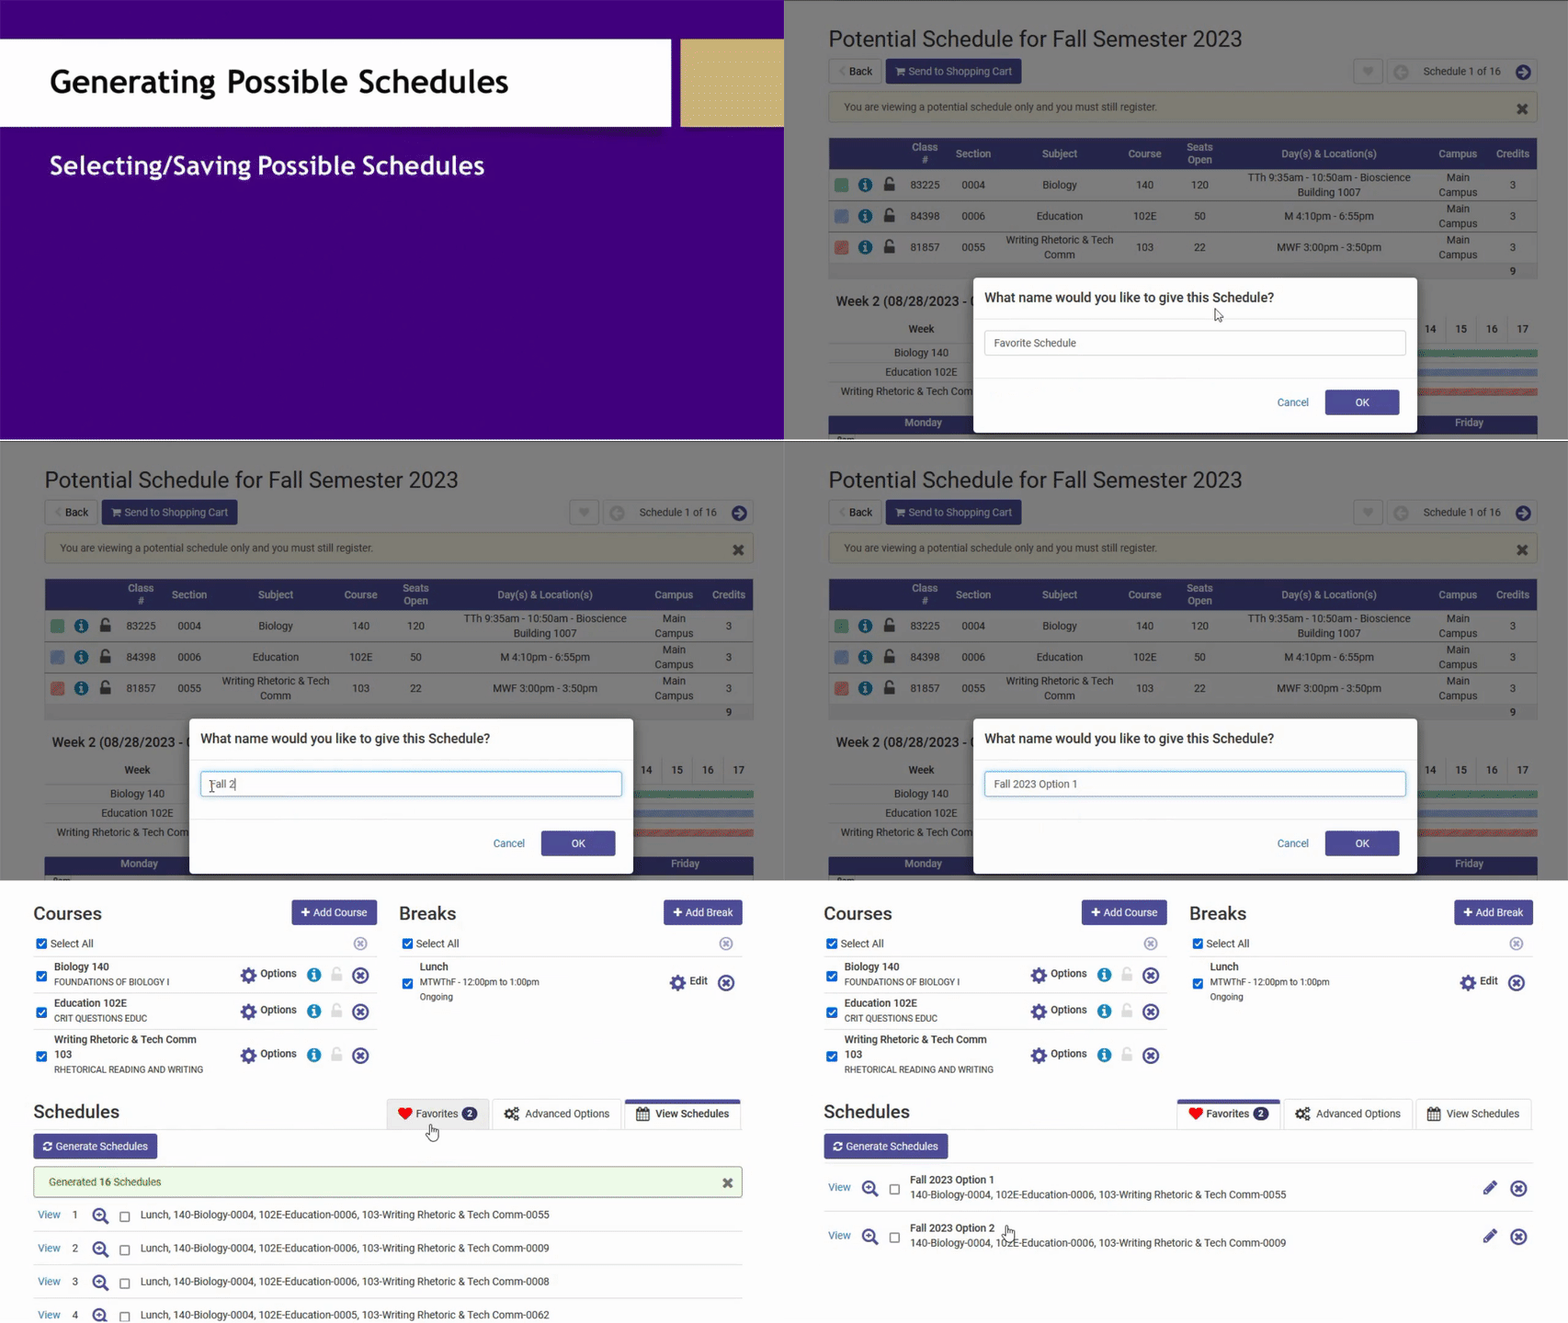
- To save an entire schedule, click the heart icon at the top. Name the schedule, and it will be saved to a Favorites tab.
- To access the Favorites tab, go to Schedules and click Favorites.
Selecting/Saving Parts of a Schedule
- To save certain portions of a schedule (not the whole thing), click the lock icon on the schedule, and it will save that particular course.
- The generated schedules will update to accommodate the locked classes and will present options that will fit with those chosen locked classes.

Send Selected Schedule to the Shopping Cart
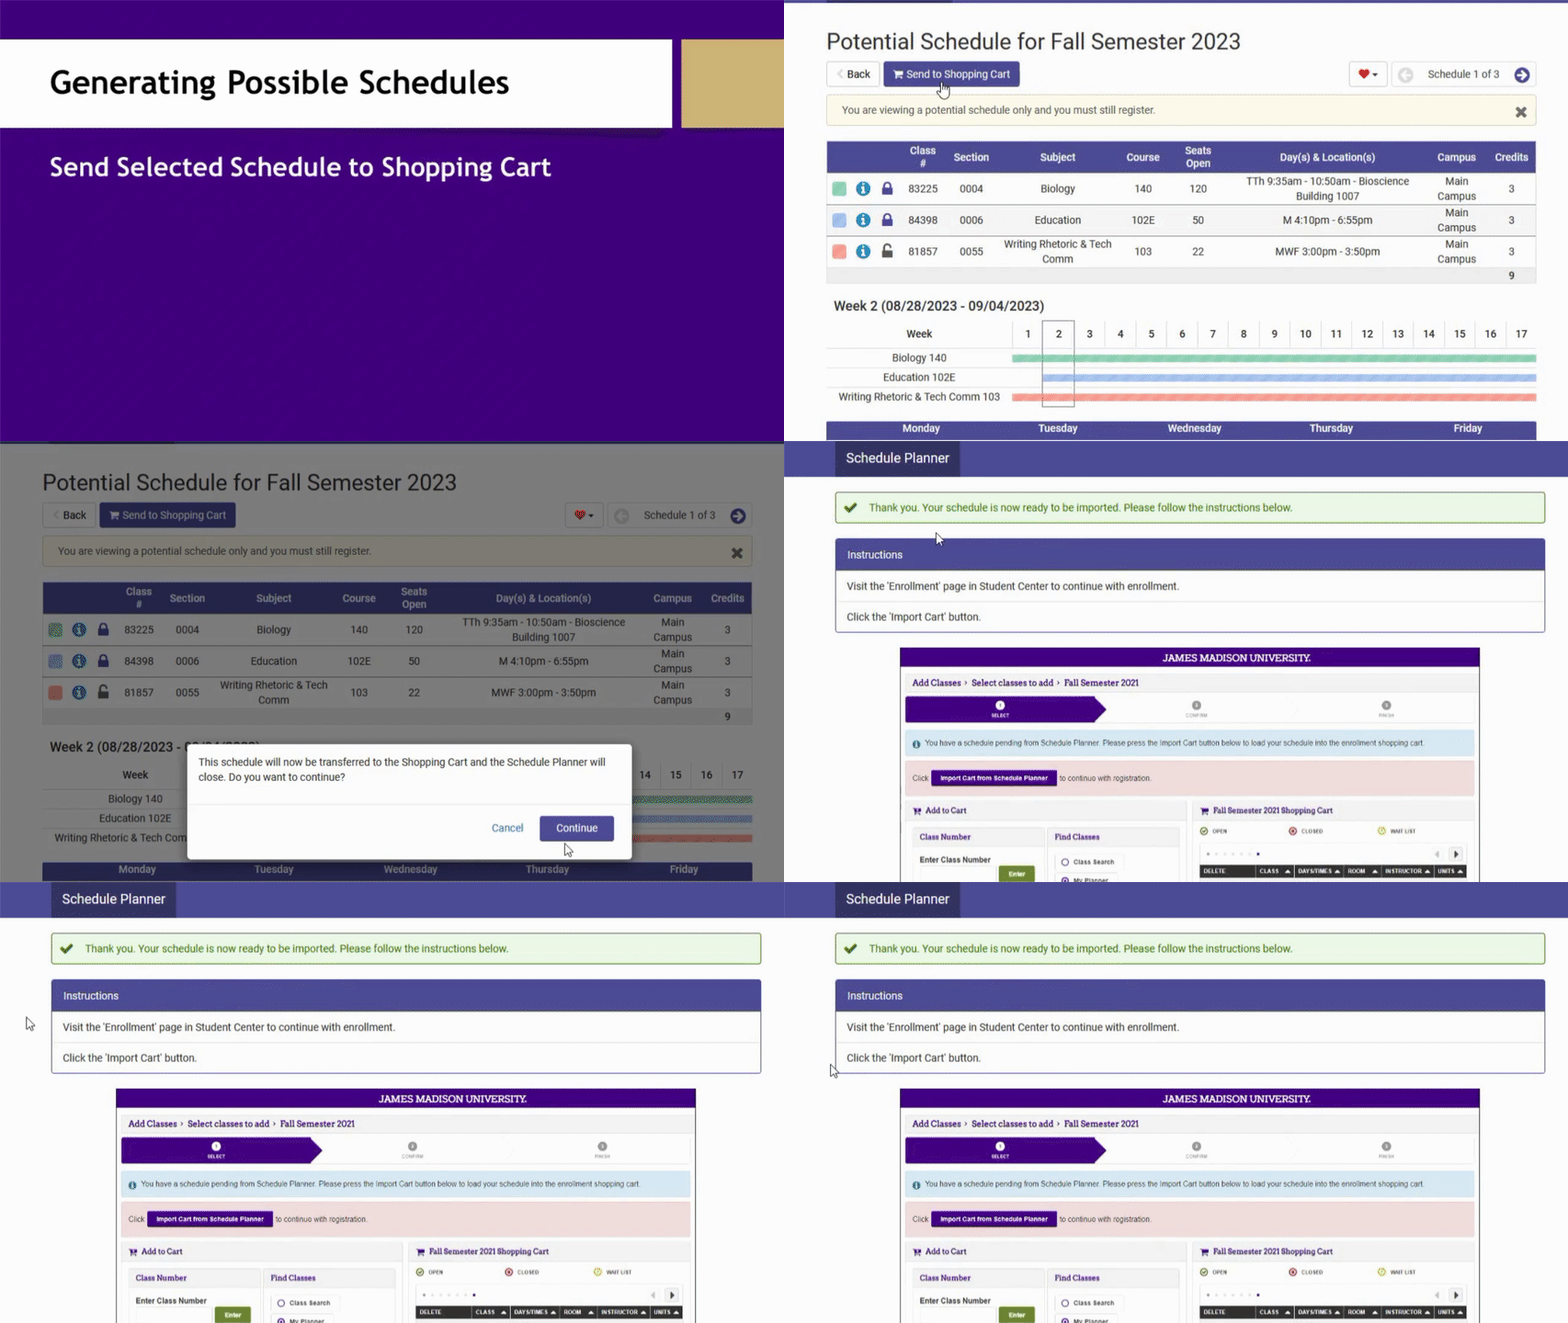
- View the desired schedule.
- At the top of the screen, click Send to Shopping Cart.
- Click Continue.
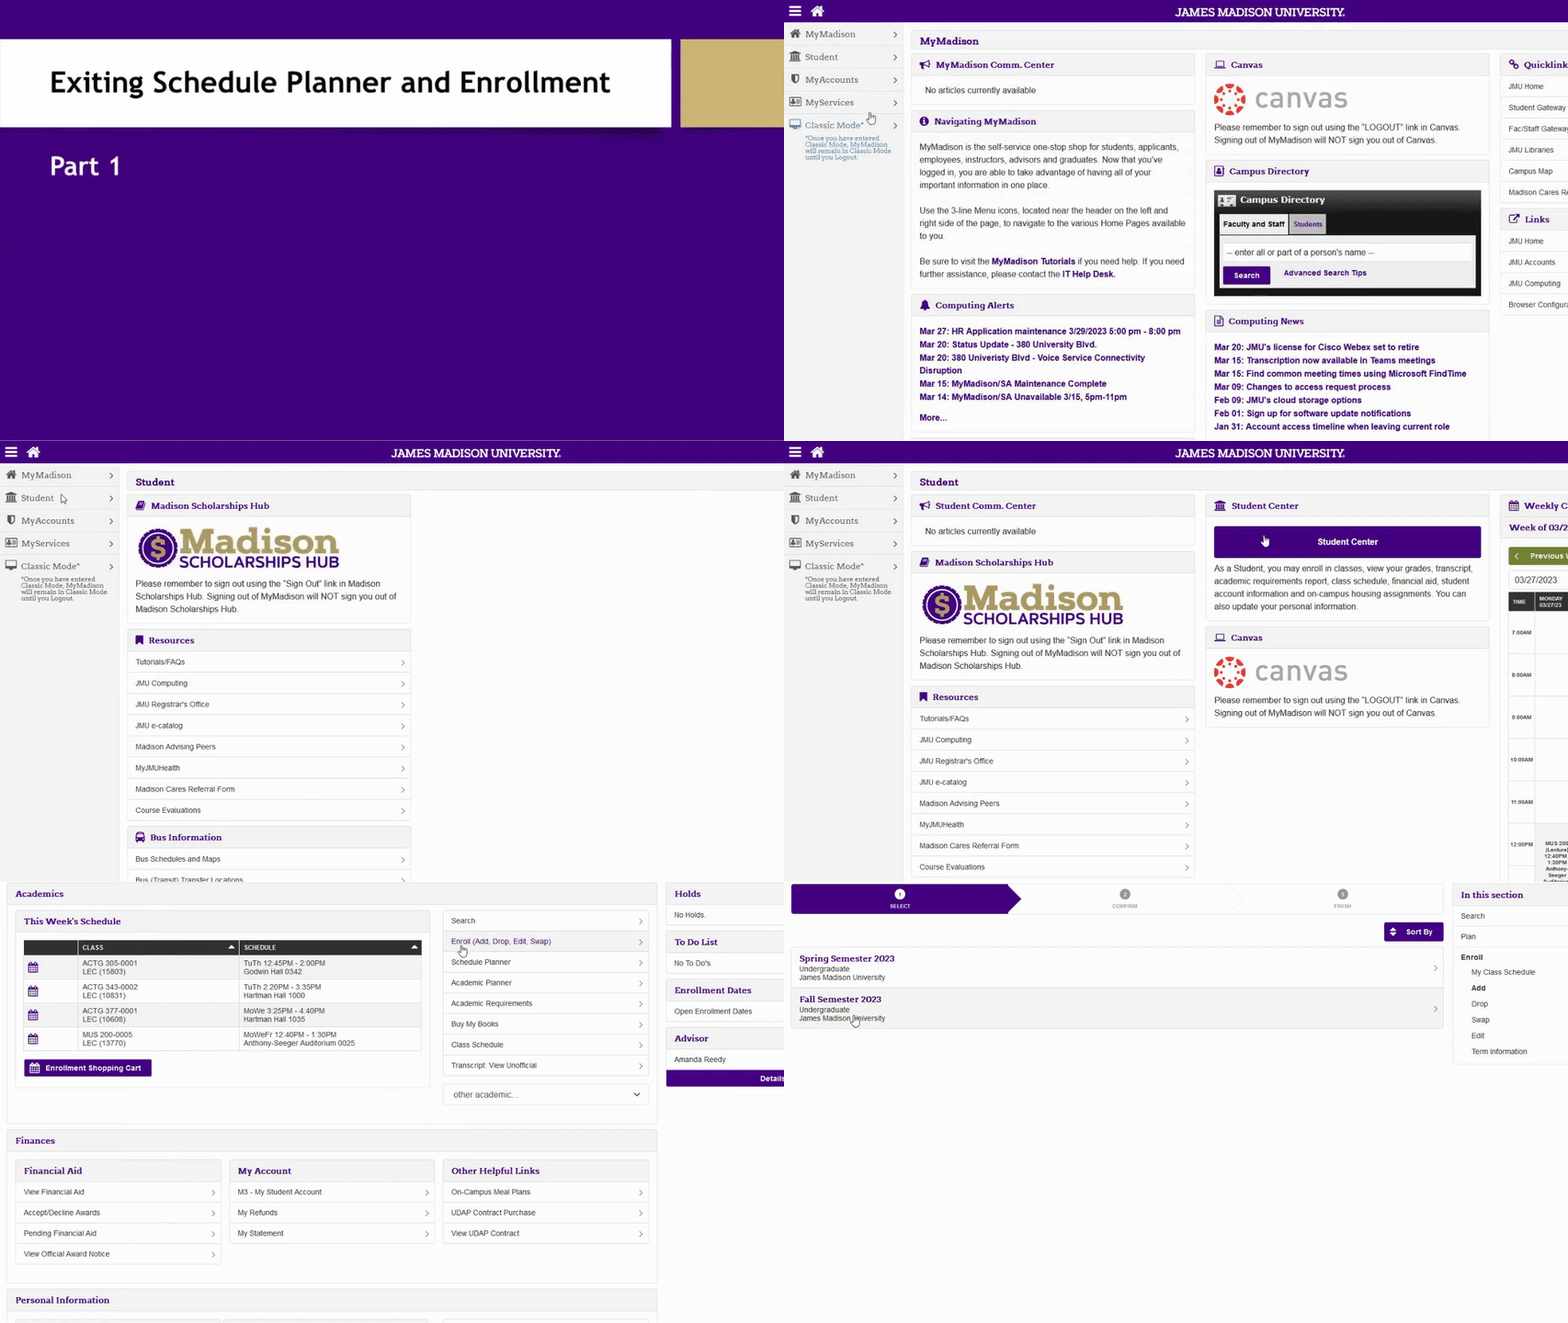
Exiting Schedule Planner and Enrollment
- Click the MyMadison tab on the web browser or log-in to MyMadison (mymadison.jmu.edu).
- Click Student in the list on the left.
- Click Student Center.
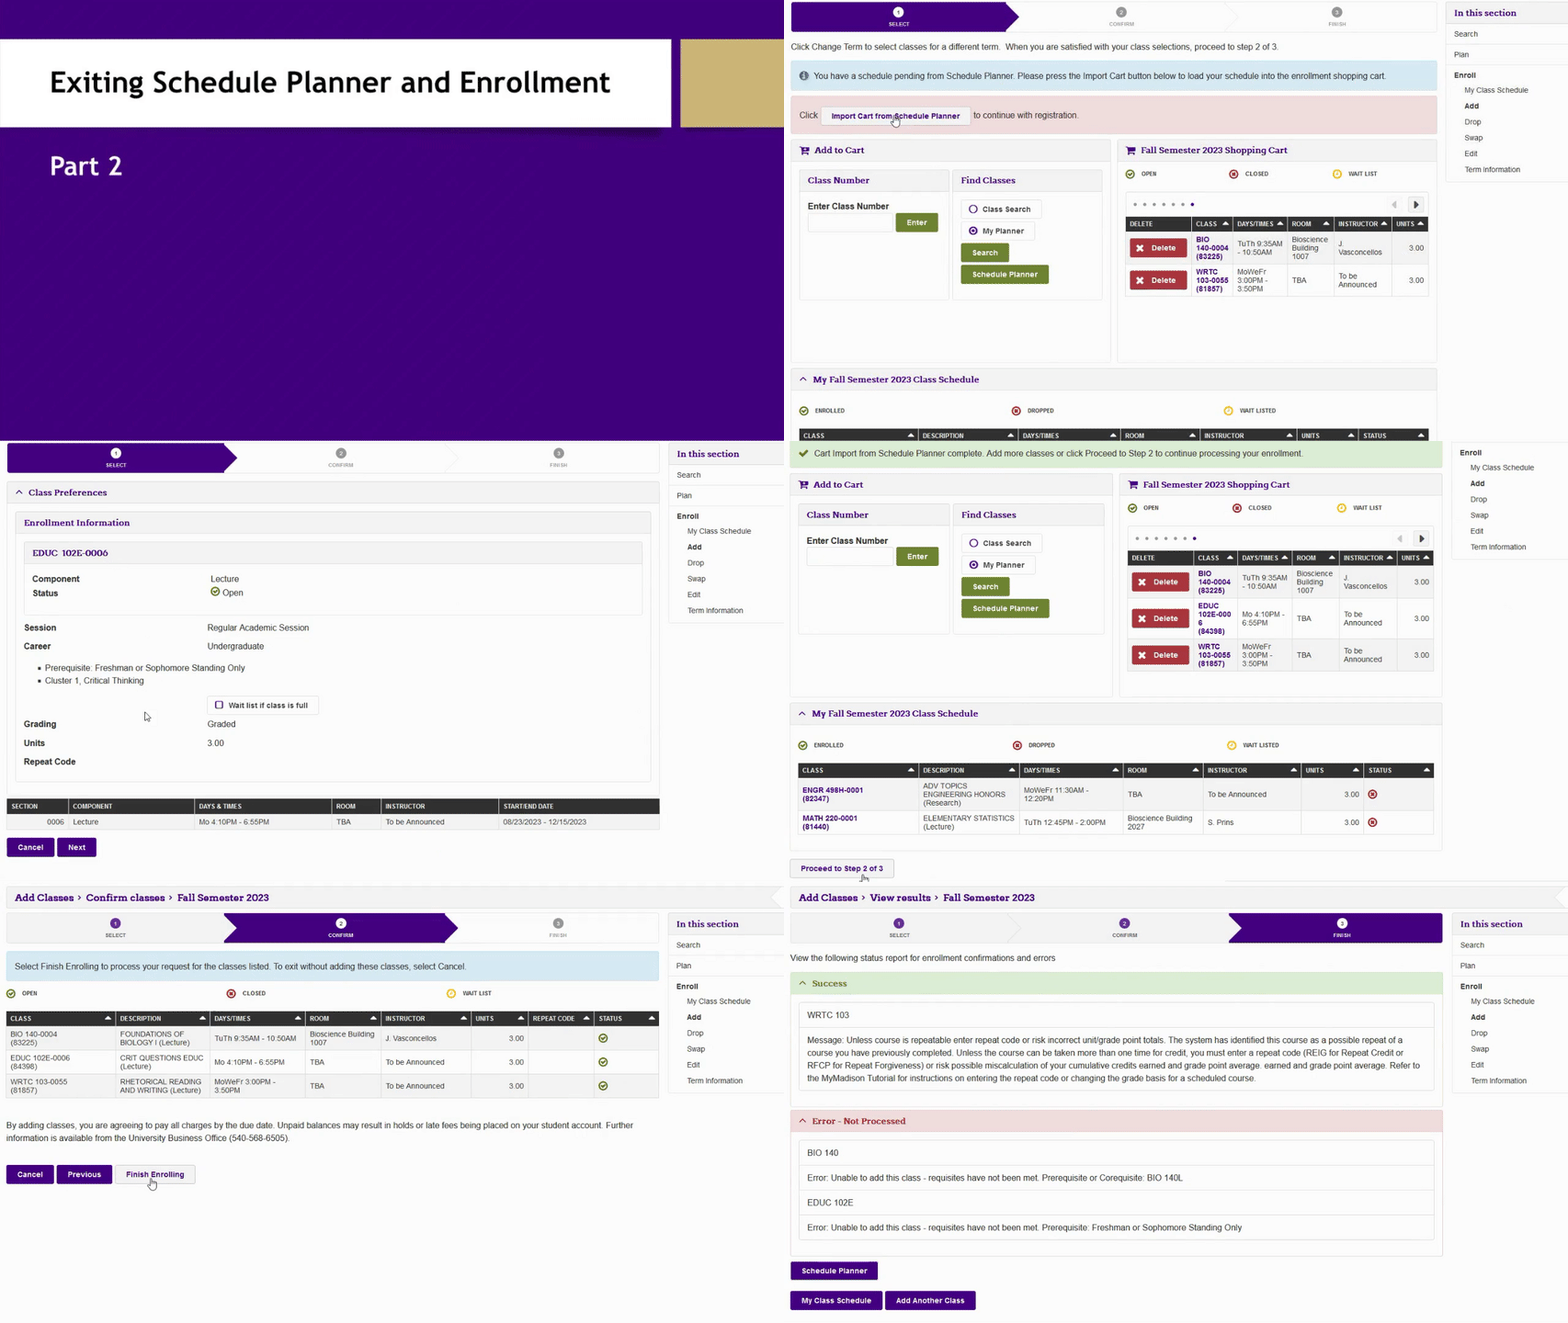
- Under academics, click Enroll (Add, Drop, Edit, Swap).
- Choose a term.
Import Schedule to Cart and Enroll
- Click Import Cart from Schedule Planner.
- Click Next.
- Confirm your selection(s) and click Proceed to Step 2 of 3.
- Click Finish Enrolling.
- Verify enrollment outcomes (Success/Error/Messages).
