
Closing an Appointment
After an advisor meets with a student, they will need to close the appointment, as well as attach any notes or attachments associated with the appointment.
All advising notes should follow the DAP model. DAP model notes use:
- Data that is factual not interpretive.
- Assessments that are supported by the data.
- Plans that let the student and other advisors know where we go from here.
For more information about writing DAP notes please reach out to your supervisor or review the Advisor Resources.
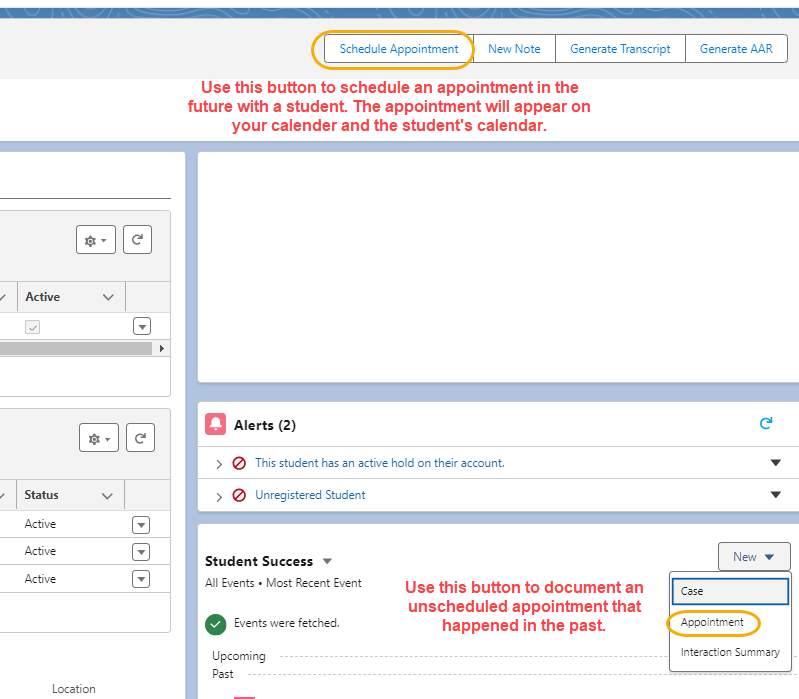
- If you have availability set up for students to schedule appointments with you, then students will schedule appointments ahead of time through MyMadison Connect. Instructions on how to close those appointments are below.
- However, you may also log an unscheduled advising appointment on the Student Success Timeline on any student account. To do this, click New on the Student Success Timeline and select Appointment. Note: clicking the Schedule Appointment button at the top of a student account will allow you to schedule a future appointment with that student so that it appears on your and the student's calendars.
Unscheduled Appointments ("after-the-fact")
- To close an unscheduled appointment, you must ensure that the following fields are populated:
- Earliest Start Permitted: this field is meaningless, but it is required for Salesforce to process the appointment.
- Scheduled Start: this is when the appointment actually began.
- Scheduled End: this is when the appointment actually ended.
- The Scheduled fields must be populated for the appointment to appear on the Student Success timeline.
- Due Date: this field is meaningless, but it is required for Salesforce to process the appointment.

- Once these fields are populated, as well as changing the Status, Post Appointment Summary Topics, and any Advising Notes, click Save.
- Note: entering data into the Student Comments field will populate the title of the meeting on the Student Timeline.
- A summary screen of the appointment will appear. On the right side of the screen, click the dropdown arrow in the Assigned Resources field and click New.

- In the Service Resource field, type and select the name of the advisor who is assigned to this appointment (in many cases, this will be your name).
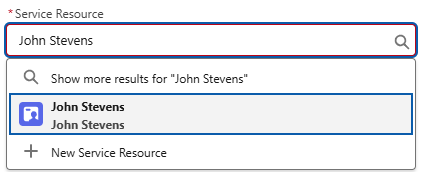
- Click Save.
Scheduled Appointments
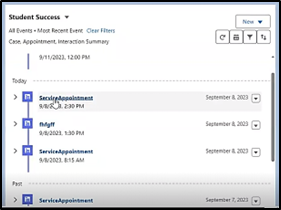
- To close a previously scheduled appointment, navigate to the student’s account. Locate the appointment in the Student Success Timeline on the right side of the screen and click the appointment to open up the appointment details.
- In the Appointment Details section, click on any pencil icon to open up editor mode.
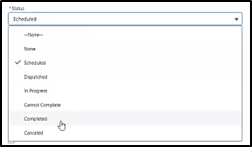
- Click the Status dropdown menu and click Completed.
- Select the topic(s) that best describes what was actually discussed during the appointment, even if the topic(s) deviated from the originally requested topic. Click the right arrow to move the topic(s) from the Available field into the Chosen field. Note: Every appointment must have at least one Post Appointment Summary Topic.
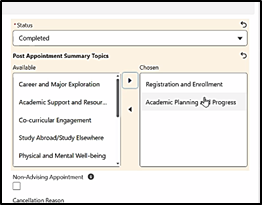
Note: if an appointment was not an advising-related meeting, then you should click Other as the Post Appointment Summary Topic and check the box indicating Non-Advising Appointment. These types of appointments will then be excluded from certain reports/metrics.
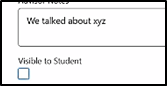
- Any comments in the Student Comment field were populated when the student made the appointment. To leave notes about the appointment, type comments into the Advisor Notes. By default, Advisor Notes are not visible to the student. However, by checking the Visible to Student box, the student will be able to see any comments left in this field should they return to the appointment record. Regardless, any notes left by the advisor in this field would be visible to all non-students who have access to this appointment record.
Note: for guidance on the types of notes to enter into the CRM, please refer to the Sample of Advising Notes document on the Advising Resources page.
- Click Save.
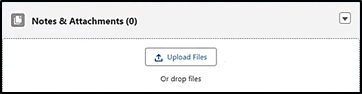
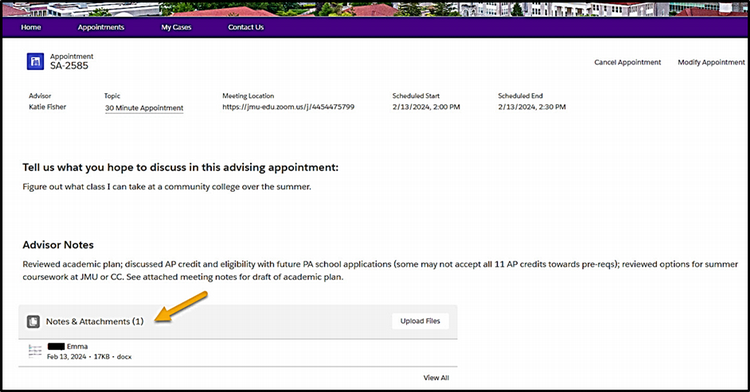
- If you would like to attach any document(s) to the appointment record, click Upload Files in the Notes & Attachments field to retrieve the document, or simply drag and drop the document into that field. Note: by default, any uploaded document is not viewable by the student.
- In order to grant access to the student to see the file, click on the file name/link and select Share at the top of the screen.
- A new view box will open prompting you to select who you would like the share the document with. Click Who Can Access.
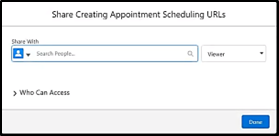
- You should see your name and the appointment ID appear in the expanded menu under Who Can Access. Click the slider next to the appointment ID to change the Customer Access to On.
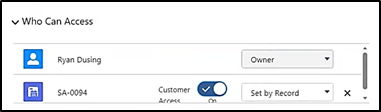
- Click Done and exit the file preview screen.
Canceling an Appointment
When an Advisor or a Student cancels an appointment, an email will be sent to both parties with the status of the appointment updated to Canceled.
