Advisors may wish to view their appointments with students in their Outlook calendar. You have the ability to connect the CRM to Outlook to ensure your Outlook calendar syncs with your CRM appointments. This is a two-way process, so once you have connected the CRM with Outlook, you need to connect Outlook with the CRM using the steps in the Outlook Plugin, as shown below.
Once the two-way setup process is complete, any appointment a student makes with an advisor through MyMadison Connect will automatically populate on the advisor’s Outlook calendar. Similarly, the CRM will automatically block appointment availability for appointments to be scheduled through MyMadison Connect if a meeting or appointment already exists on the advisor’s Outlook calendar. This is true even if the advisor has previously established appointment availability through the CRM (in other words, individual appointments/meetings on Outlook will override availability previously established through the CRM).
Note: Users should not sync the CRM with their personal/private email address (For example: @gmail.com or @yahoo.com). The CRM should only be linked to your @jmu.edu email address.
- In the top-right corner, click your profile icon.

- Click Settings.
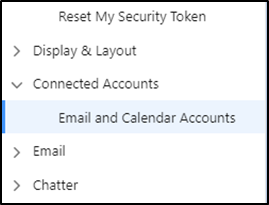
- On the left-hand side of the screen, select Connected Accounts and then click Email and Calendar Accounts.
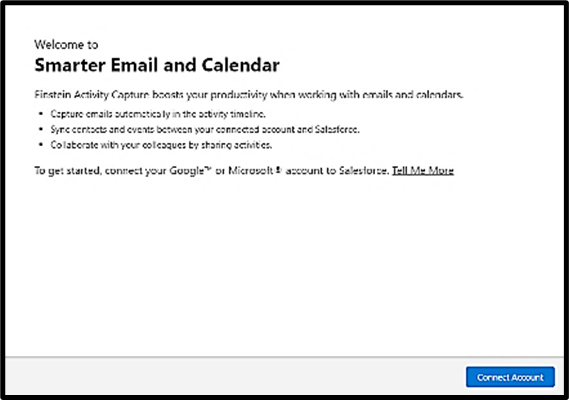
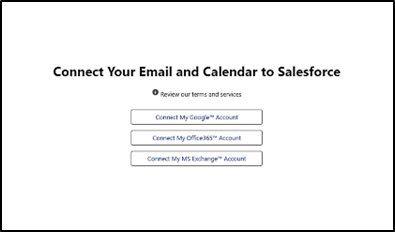
- A screen will pop up entitled Smarter Email and Calendar. Click Connect Account.
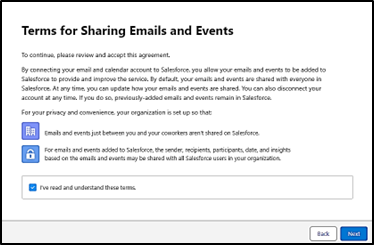
- On the Terms for Sharing Email and Events page, check the box to agree to the terms and click Next.
- Click Connect My Office365 Account.
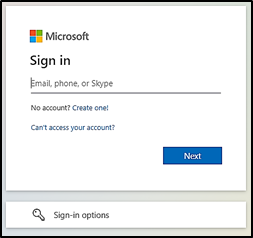
- Sign in with your JMU email and password, then authenticate your login.
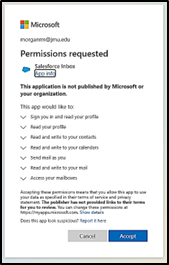
- A permissions screen will appear. Click Accept.
Outlook Plugin
The Outlook plugin allows you to connect Outlook to the CRM, it also allows you to create a case from an email.
Add the Salesforce Plug-in to Outlook
- Launch Outlook (either through outlook.com or the desktop version. Note: if using the desktop version, please make sure New Outlook is toggled off. You can check this in the upper-right corner of the Outlook window.).
- From the Home tab, click All Apps.

- Click All Apps.
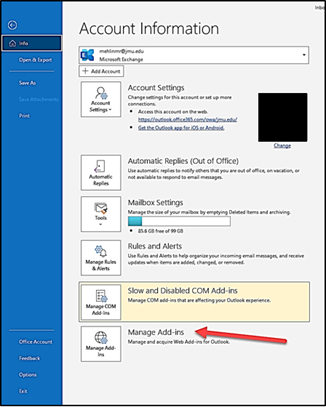
- You may also choose to get the Salesforce Add-in by going to File > Manage Add-ins.
- Search for "Salesforce". Select the Salesforce Add-in that has "Boost productivity..." in its description.
-

- Click Add.
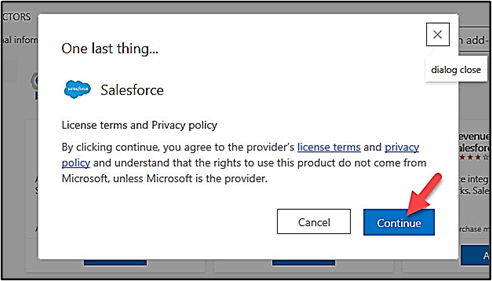
- Agree to the terms and policies by clicking Continue.
- The Add button is replaced with Get Started once it’s installed. Select it.

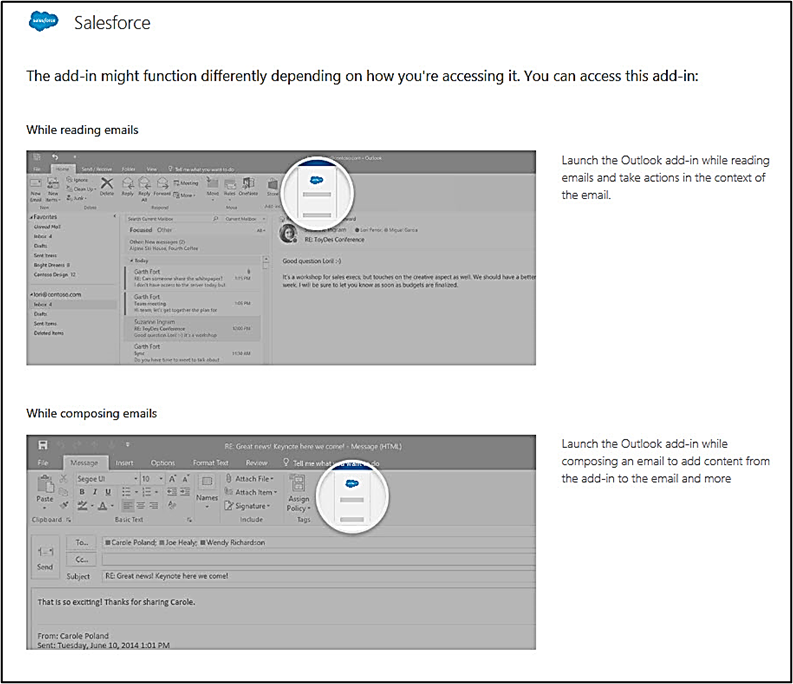
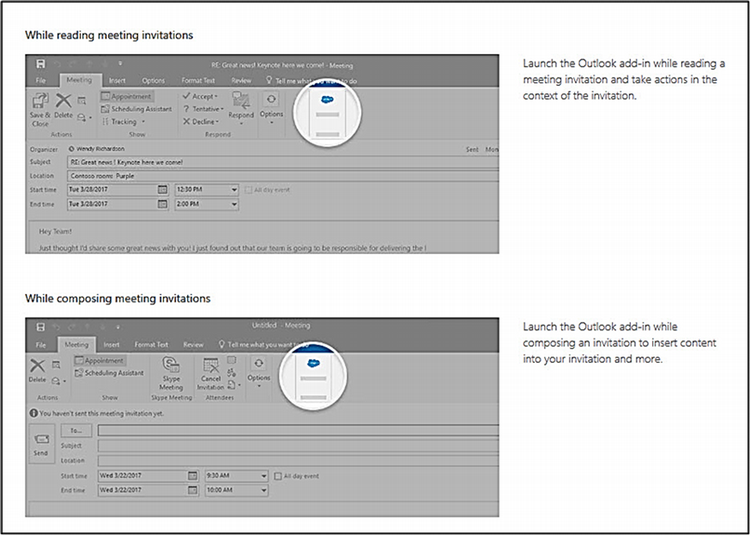
- Review the helpful app description/instructions:
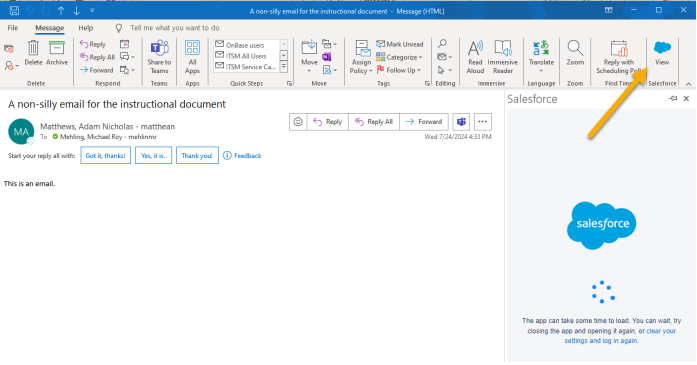
- The Salesforce add-in now appears in the ribbon:
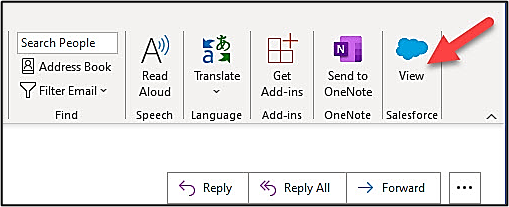
- Click on the Salesforce Add-In. Click Log In to Salesforce.
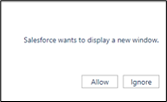
- You’ll be prompted to display a new window. Click Allow.
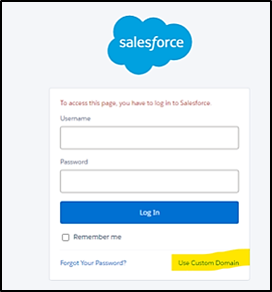
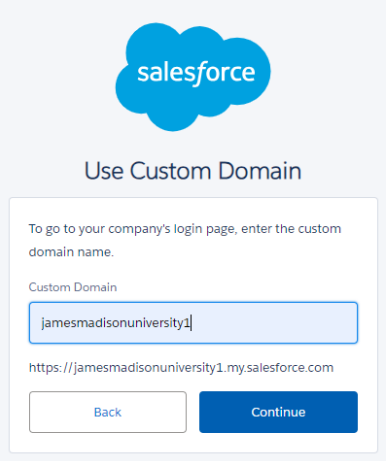
- To log in with JMU credentials (eID and password), click the Use Custom Domain link.
- In the Custom Domain field, type jamesmadisonuniversity1:
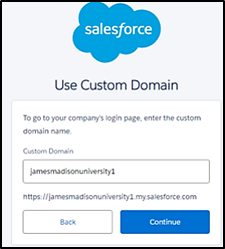
- Log in and click Confirm.
Special note about calendar syncing for MAPs: Since CRM requires all licensed users to sync their Outlook calendar with Salesforce, MAPs must also do the calendar syncing steps and sync their employee account (@jmu.edu) with CRM. However, since most of their student events do not exist on their employee calendar, MAPs will need to log into their employee email and add blocks of time to their employee calendar to prevent CRM from scheduling appointments overtop of these time slots. MAPs cannot sync their @dukes.jmu.edu student calendars with CRM because then appointment data in CRM would appear on, and be synced with, their student calendar/account.
Logging Emails via the Salesforce Add-In in Outlook
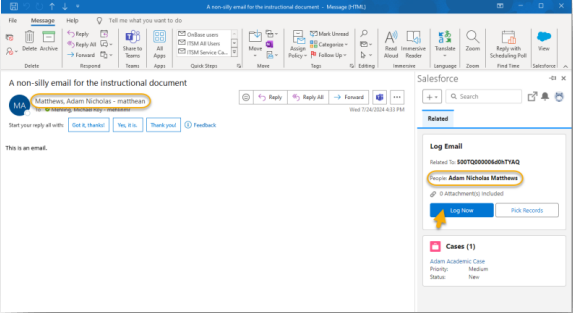
- With the Salesforce Add-In installed in Outlook, open an email from a student (this only works with emails from an @dukes.jmu.edu address).
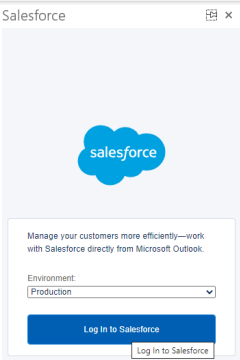
- Click on the Salesforce Cloud Icon to launch the Salesforce Add-In.
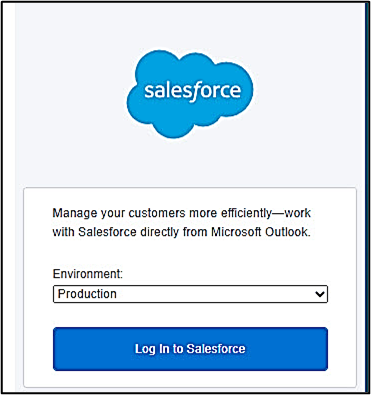
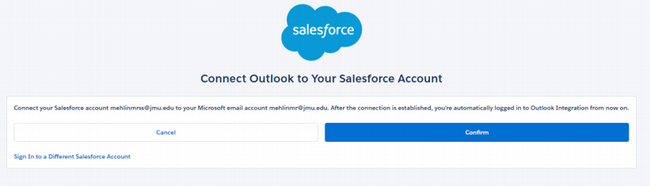
- If you are not currently logged in to Salesforce, then you may be prompted to do so. Choose Production, then Log in to Salesforce.
- Salesforce will open in a browser. On the login screen, choose Use Custom Domain.
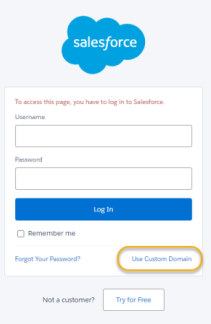
- Enter jamesmadisonuniversity1 and click Continue.
- Log in with your JMU eID and password. Click Confirm on this screen, which will get you logged in to Salesforce.
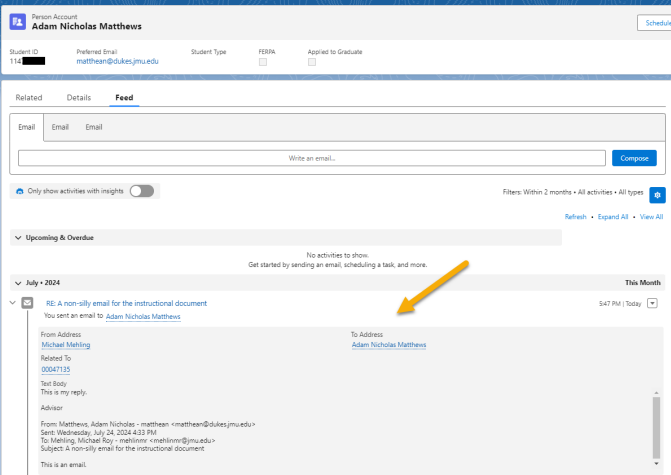
- In Outlook, the Add-In will automatically associate the email with the student’s account in CRM. If you want to log it to the student’s Feed tab on their Account page, click Log Now.
- To log the email when you send a response, click Reply on the student’s email. Now click the Salesforce Add-In from the email message form. Notice the interface looks different on a reply email.
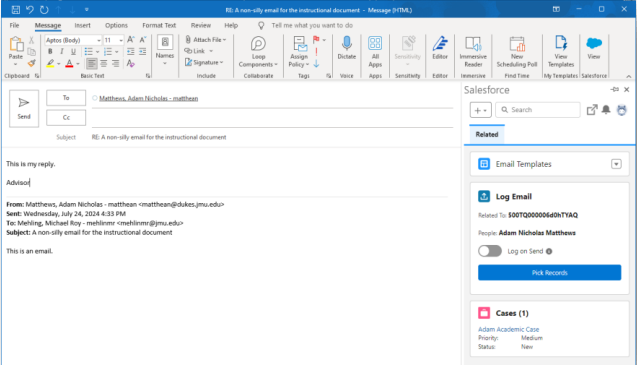
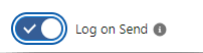
- Compose your reply. Before sending, activate the Log on Send toggle.
- When you send the Reply, the Email chain will be stored in the student’s Feed tab on their Account page.
Other options when replying to an email:
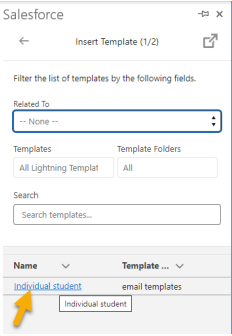
- Use an email template from your library in CRM by clicking Email Templates. Search for templates in your library, select the one you want, and it is added to your Reply email.
![]()
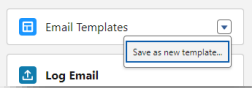
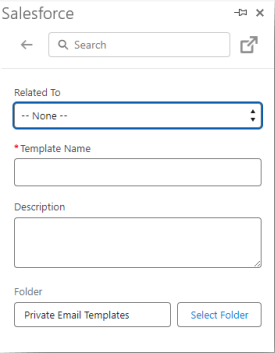
- Create an email template from the Reply you are about to send. Relate it to a specific business object (not necessary), name the template, and select the folder where you would like to store it.
Other options for logging an email, whether an incoming email or a reply:
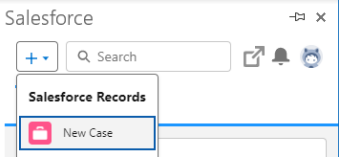
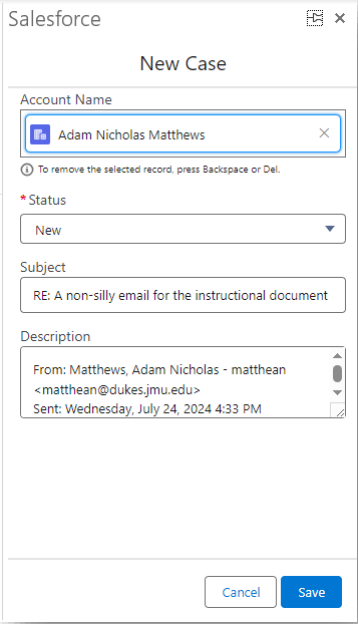
- Create a Case from the email by clicking on the plus sign. Then fill out the basic elements and click Save. It is now a Case on the student’s account and the student is notified by email when a new Case is created.