Many Cascade documents require an image to be a particular size before being uploaded. On this page, you will learn a common sizing mistake as well as how to properly resize your images.
A common mistake when resizing images is to "squeeze" them into certain dimensions. For example, imagine you want to resize this large image (1166 x 700):

If you wanted to make it a "one-third-width" Action Link, you would consult the image sizing guide and see that it needs to be 480px wide and 346px tall.
If you merely resized the image to those dimensions, it would end up looking like this:

See how it is "squished" and distorted? To avoid this, you need to resize it while keeping the proportions, and then crop the image.
Here is what the image should look like:

There are two software options for properly resizing and cropping an image:
- Your personal image editing software
- Canva
Image editing software method
On most computers, you can edit the image's ratio by selecting the image from its appropriate folder and selecting "edit." If you use an image editing software like the one preprogrammed on your computer, type only one of the desired dimensions (either the width or height) and keep that padlock icon locked to maintain the aspect ratio. Most software has this padlock, but if yours doesn't, then make sure the aspect ratio is maintained by how your software does so. If you don't understand this, just follow the directions to use Canva.
Note: If the dimension you choose to enter makes the other dimension too small, use the other one. In this example, using the width dimension made the height smaller than 346px.
Using the height dimension instead made the width larger than 480px.
Now you still need to change the width to 480px. To do that, crop the image to take extra space off of the sides. After cropping, the image is 480x346 and not squished.
Canva method
Again, if you use the directions for using Canva, it ensures that the image doesn't get distorted while resizing. Follow these instructions to use the Canva method:
- Create a free account at https://www.canva.com and log in
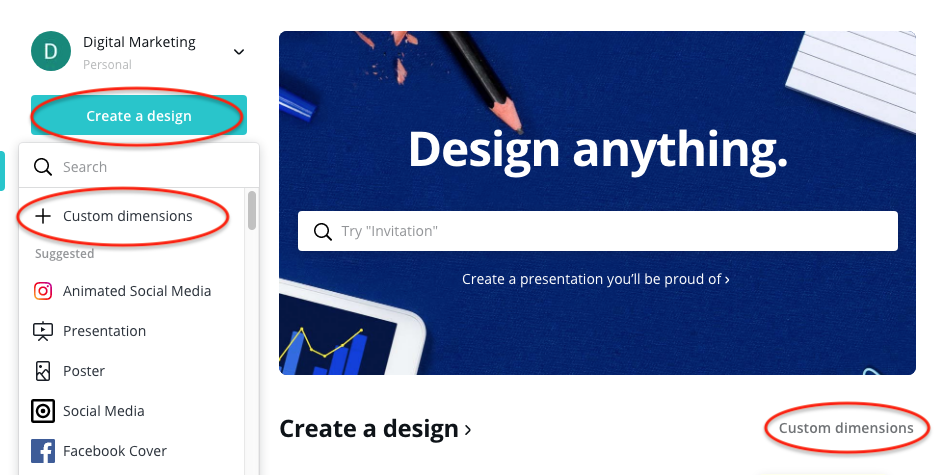
- In the top-left corner of the webpage, click "Create a design", and in the dropdown, click "custom dimensions OR click "custom dimensions" across from the "Create a design" heading
- In the custom dimensions box, type in the width and height you want to resize your image to; see image sizing chart or image sizing visual
- Note: Your image must be larger than the resize dimensions in order to maintain the quality of the image.
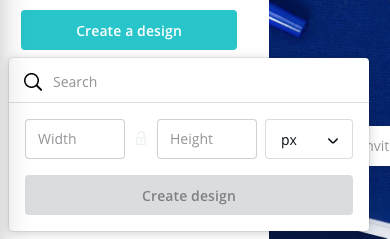
- Note: Your image must be larger than the resize dimensions in order to maintain the quality of the image.
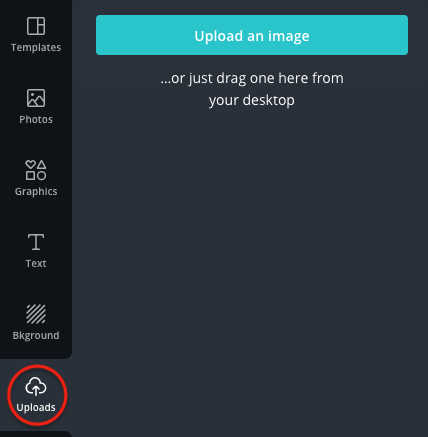
- Click the "Upload" tab on the left side menu and upload your image into Canva by dragging and dropping the image into the box OR by clicking "upload an image" and browsing your computer
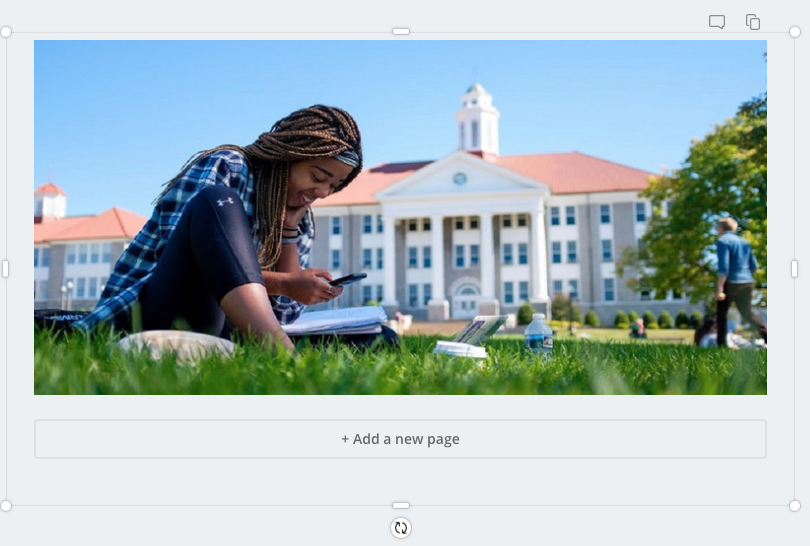
- Resize your image to fit inside the white box; drag the corners to adjust size and drag the sides to crop
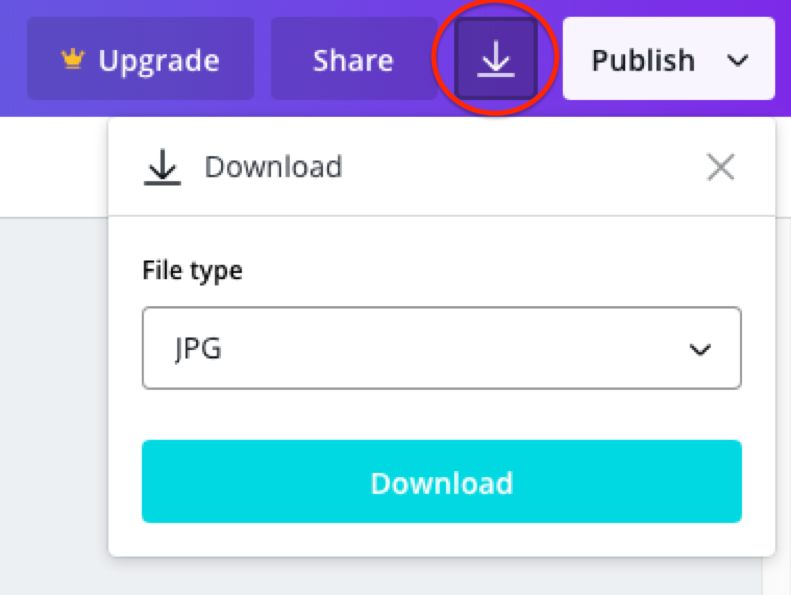
- Click the "Download" icon and then click the "Download" button
